Description: This is a brief tutorial on using the Callflow Configurator to generate call flows.
To begin the creation of a new call flow, you must first press the "Add" button.

This action opens the Callflow Configurator and generates the Main Callflow block within the Callflow diagram space.
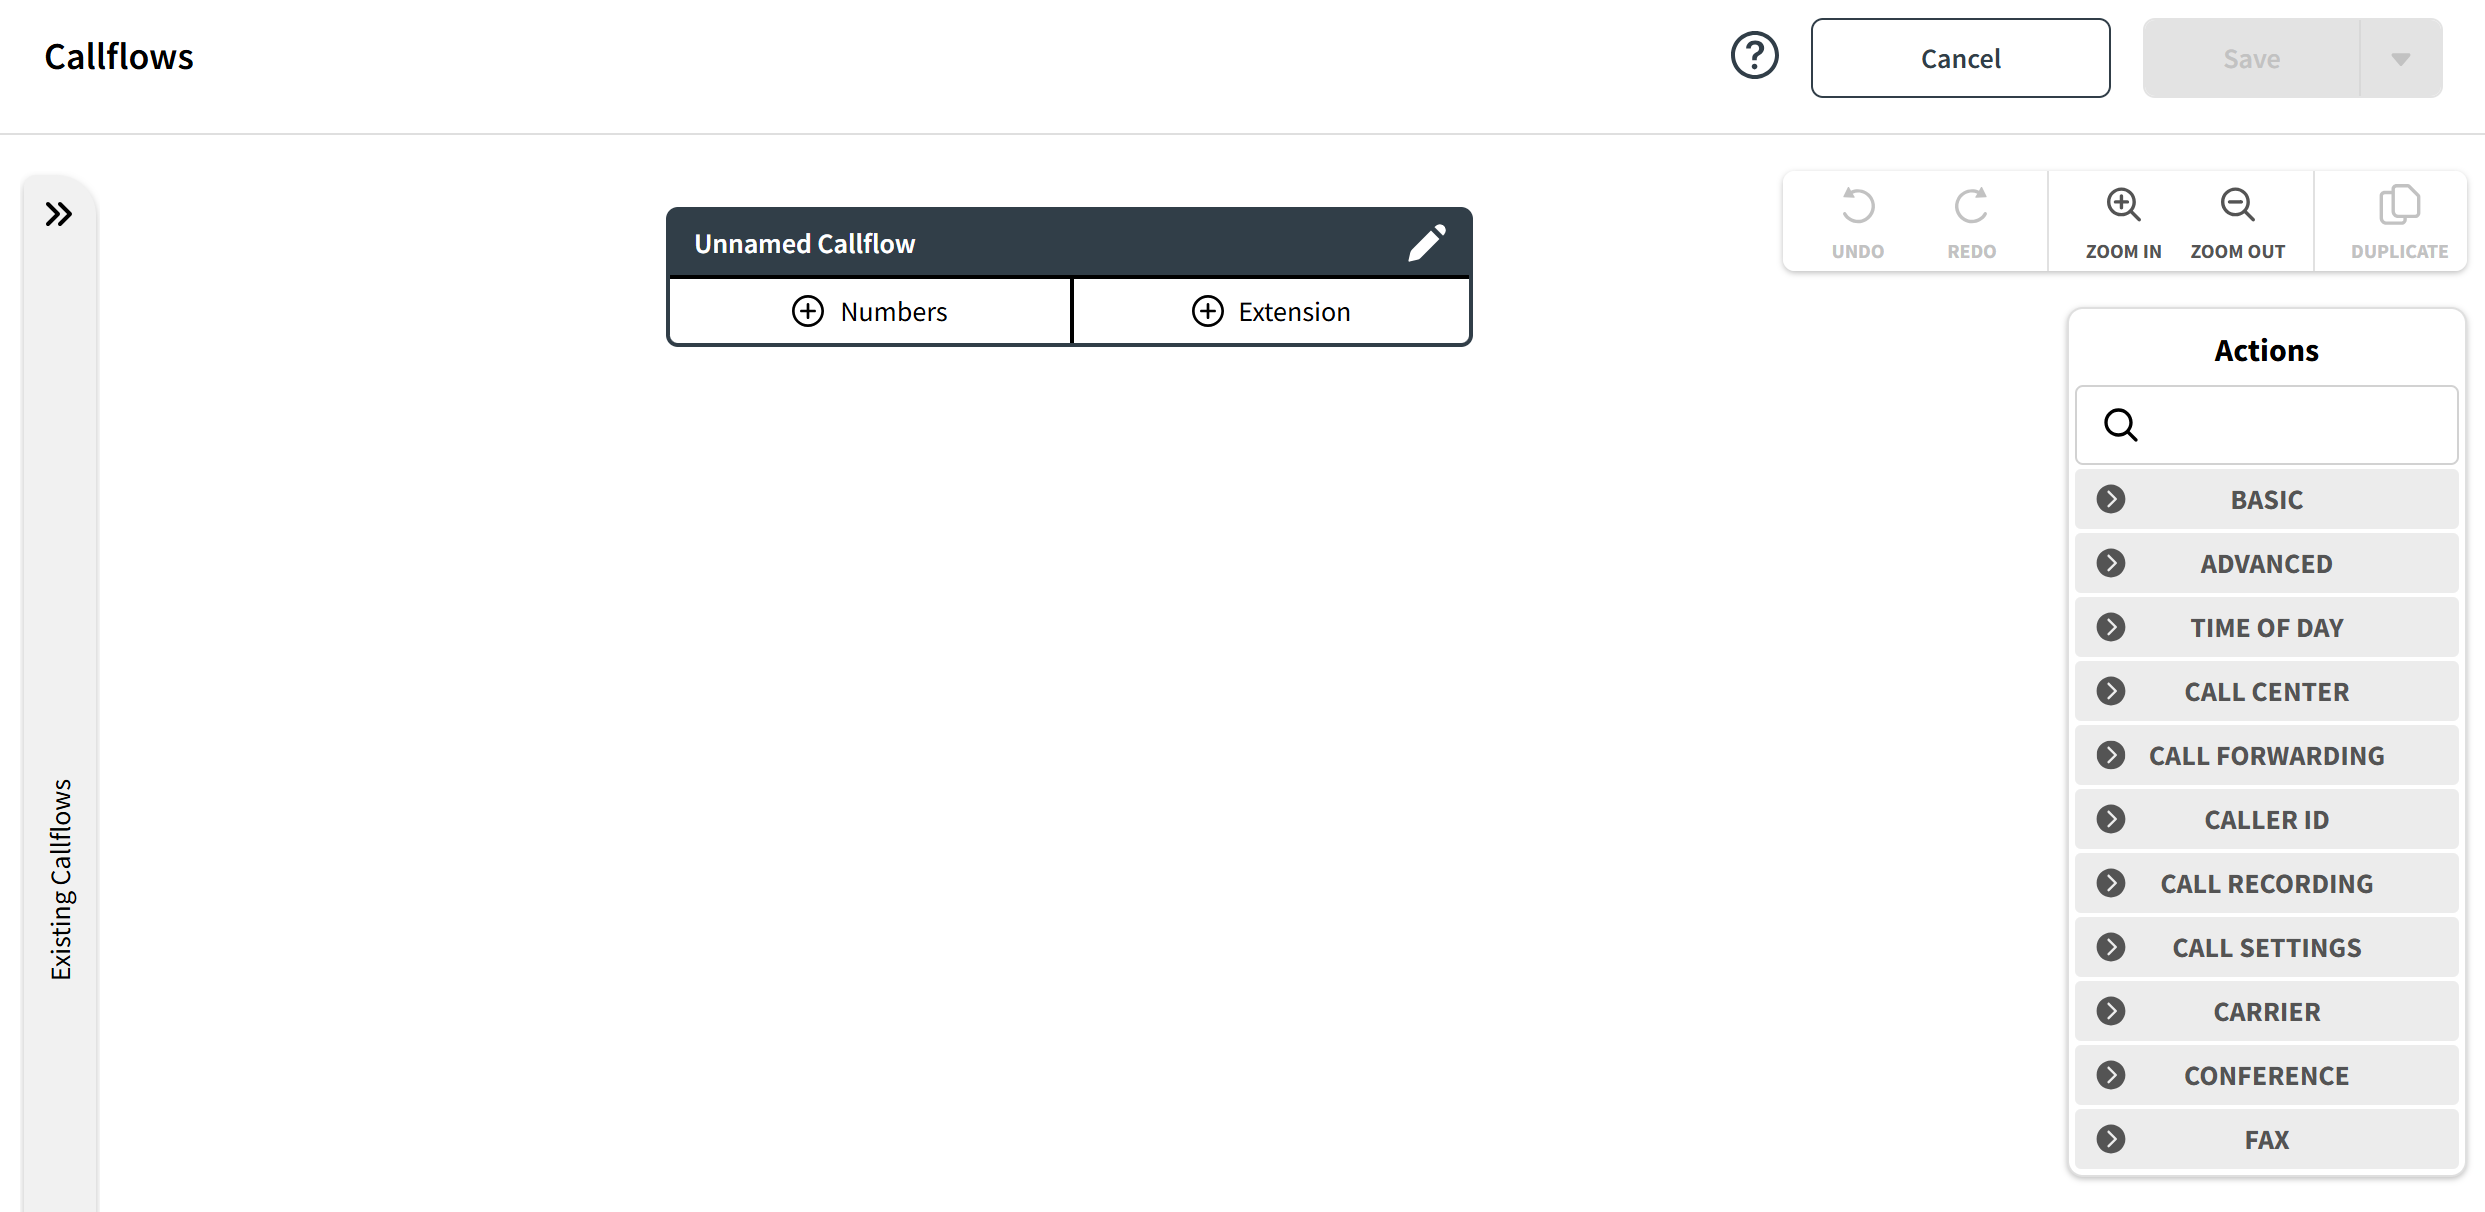
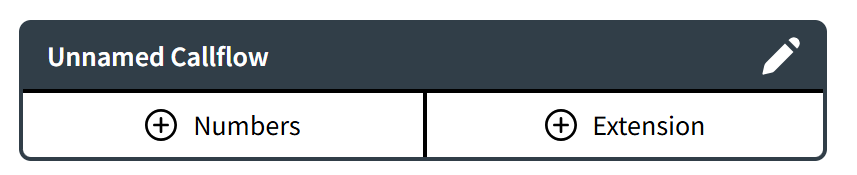
The Main Callflow Block
The Main Callflow block consists of three elements:
- Callflow Name: by default, the configured call flow name is displayed as Unnamed Callflow, but it can be modified by selecting the pencil icon button. Once you click on this button, a pop-up window will appear with various parameter fields.
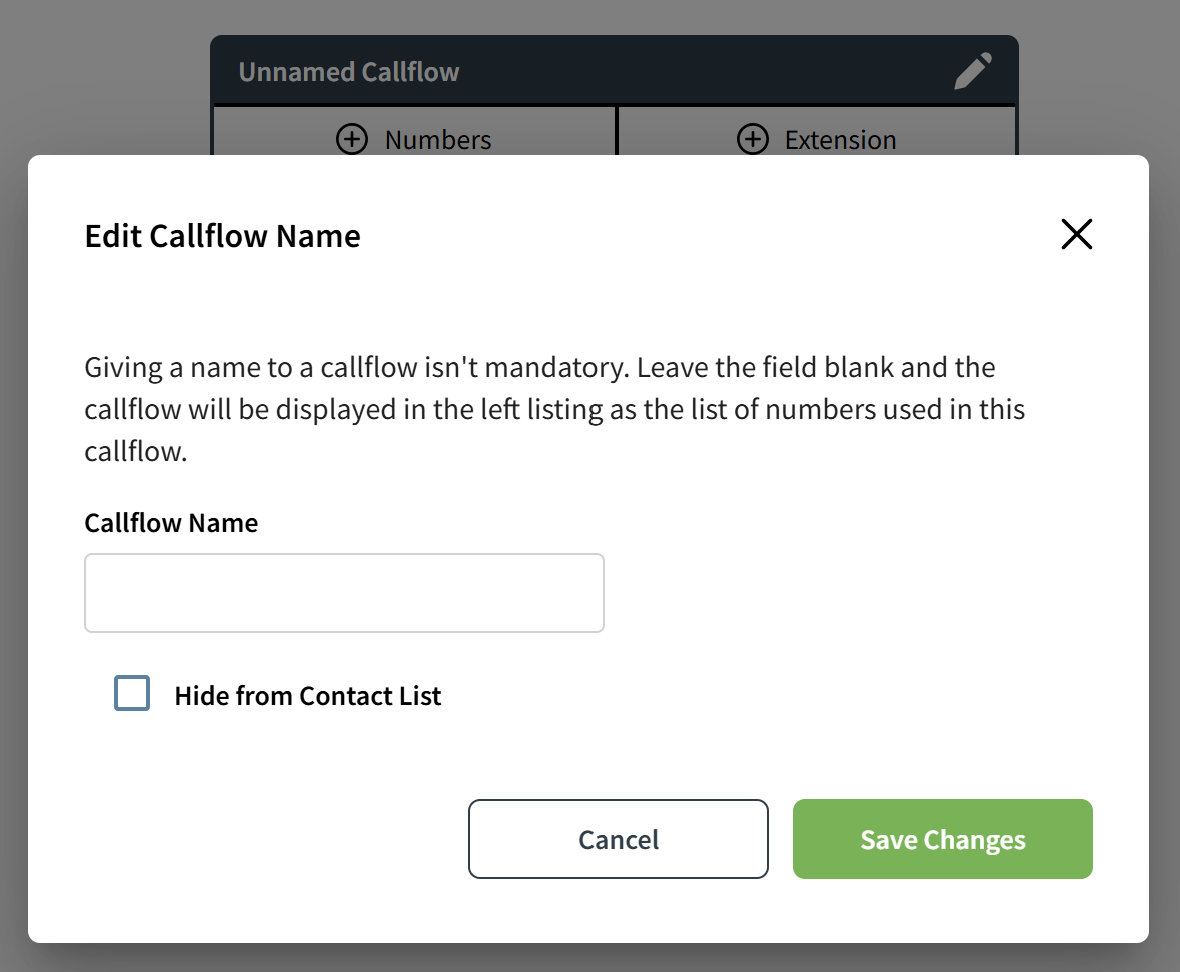
Within this window, there are two specific fields that must be configured:
- Callflow Name: here you can set a name for the configured call flow.
- Hide from Contact List: this parameter is a setting in phone systems that allows the configured device to hide its contact information from being displayed in the system's contact list.
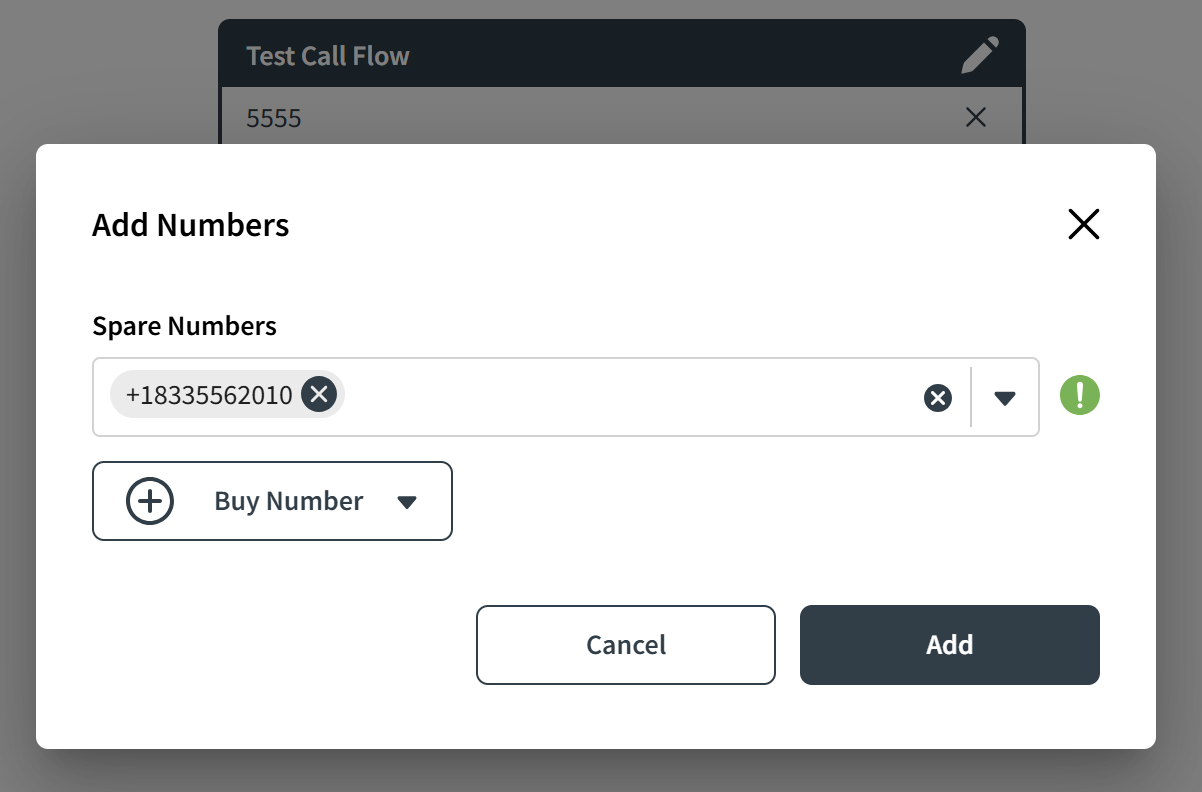
- Numbers: initially, there are no numbers associated with the configured call flow. If you select the "Numbers" option, a pop-up window will appear, presenting different parameter fields.
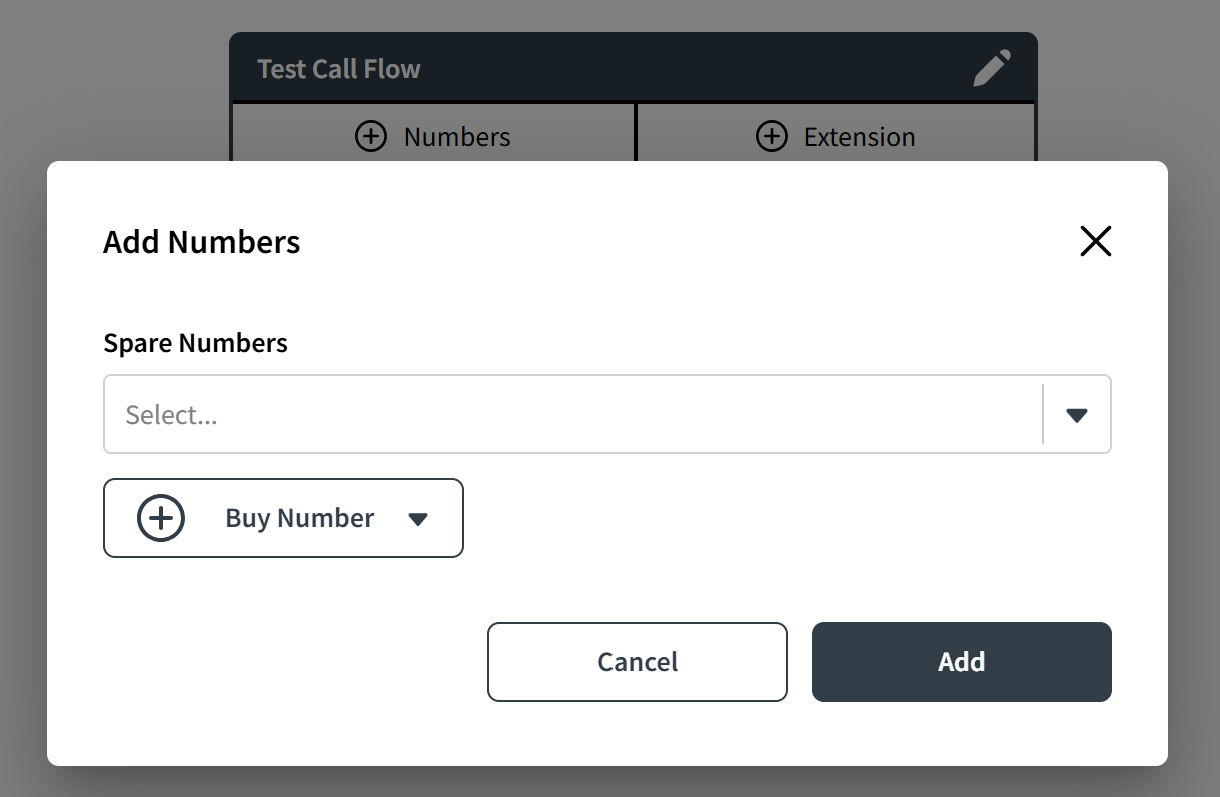
Here, you can find two options:
- Spare Numbers: click on this field and you will see a drop-down list of all available Spare Numbers that you have obtained through the Numbers App.
- Buy Numbers: if you have no available spare numbers or you need to use a new one, you can click on this button to purchase new numbers.
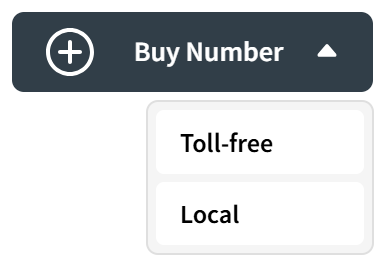
After selecting either a toll-free or a local number, a pop-up window will appear where you can specify the desired number parameters, such as the country and area code.
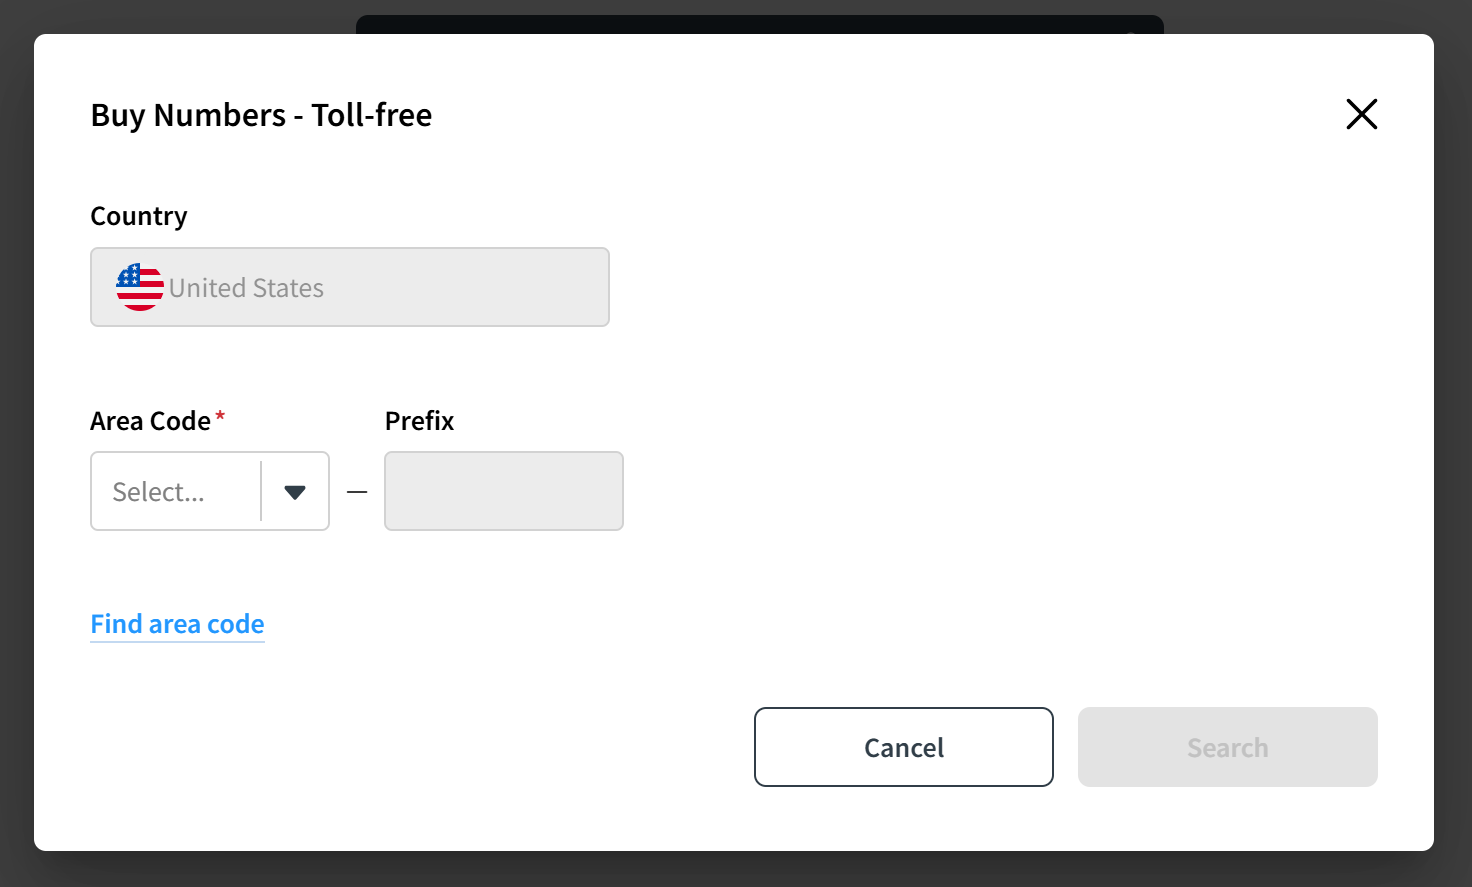
After clicking the "Search" button, the system will show you a list of numbers that suit your requirements.
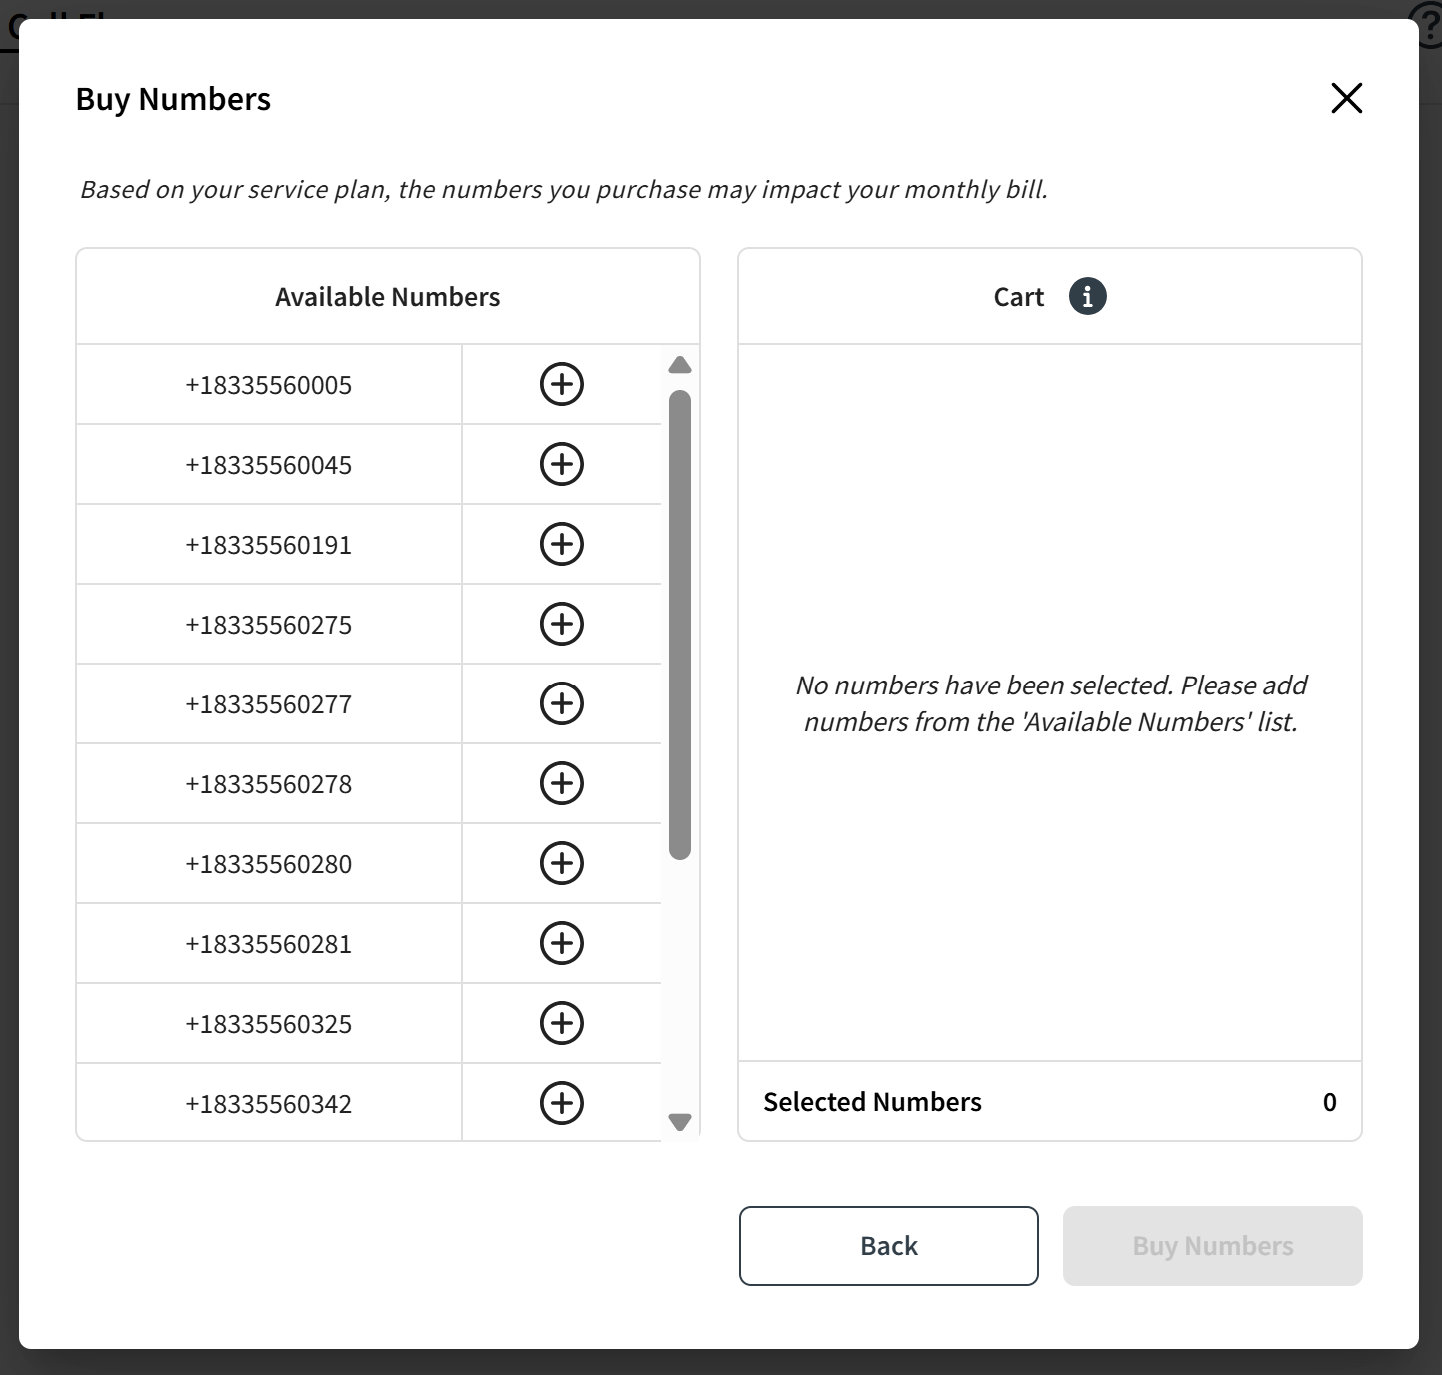
By clicking the "Plus" button near a phone number you like, you will place it in the cart section of the pop-up window. Click "Buy Numbers" to purchase all the numbers you put in the cart.
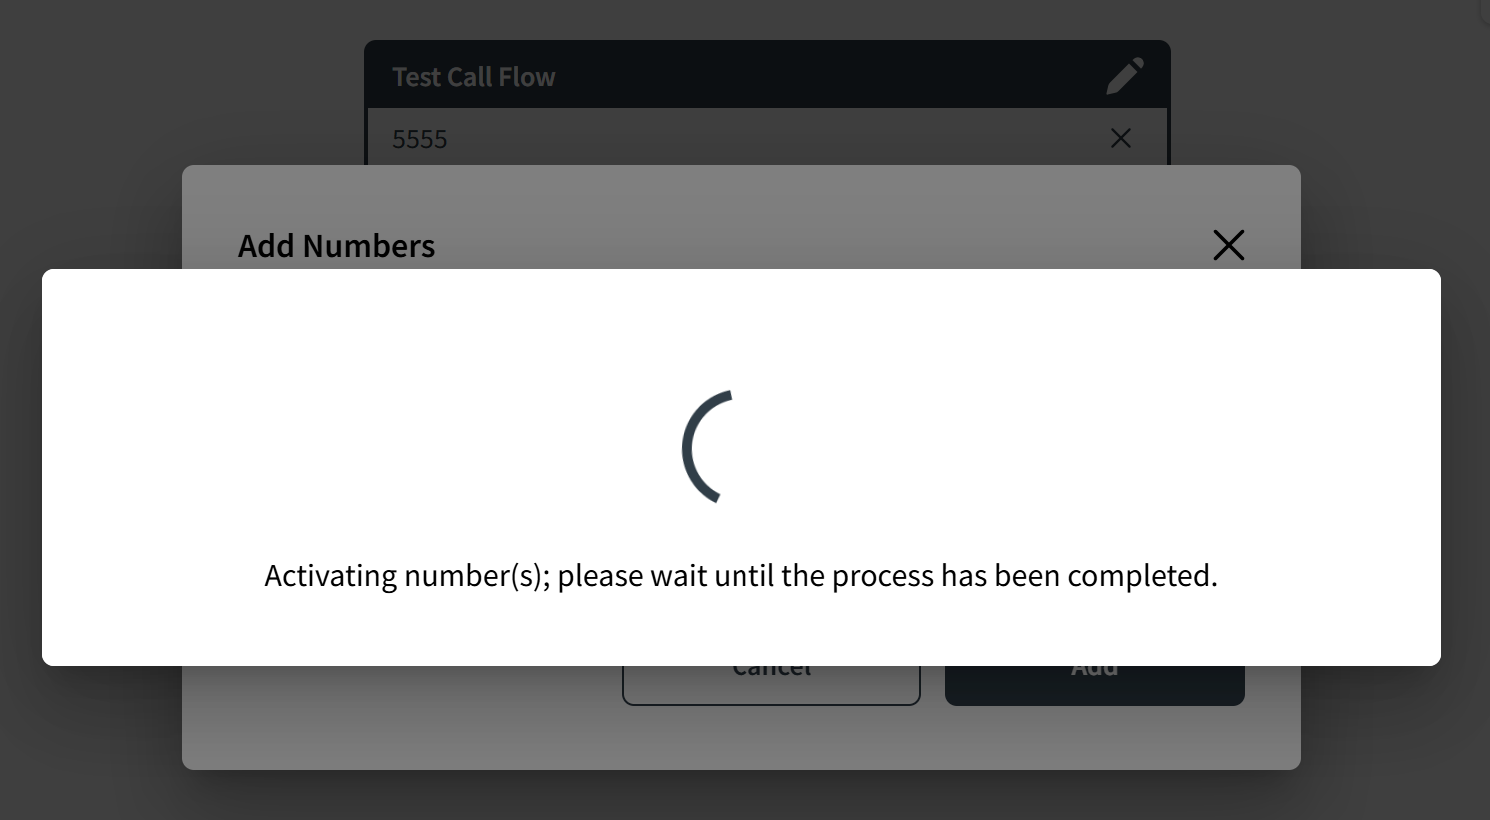
After a number is purchased, you can assign it to the configured call flow.
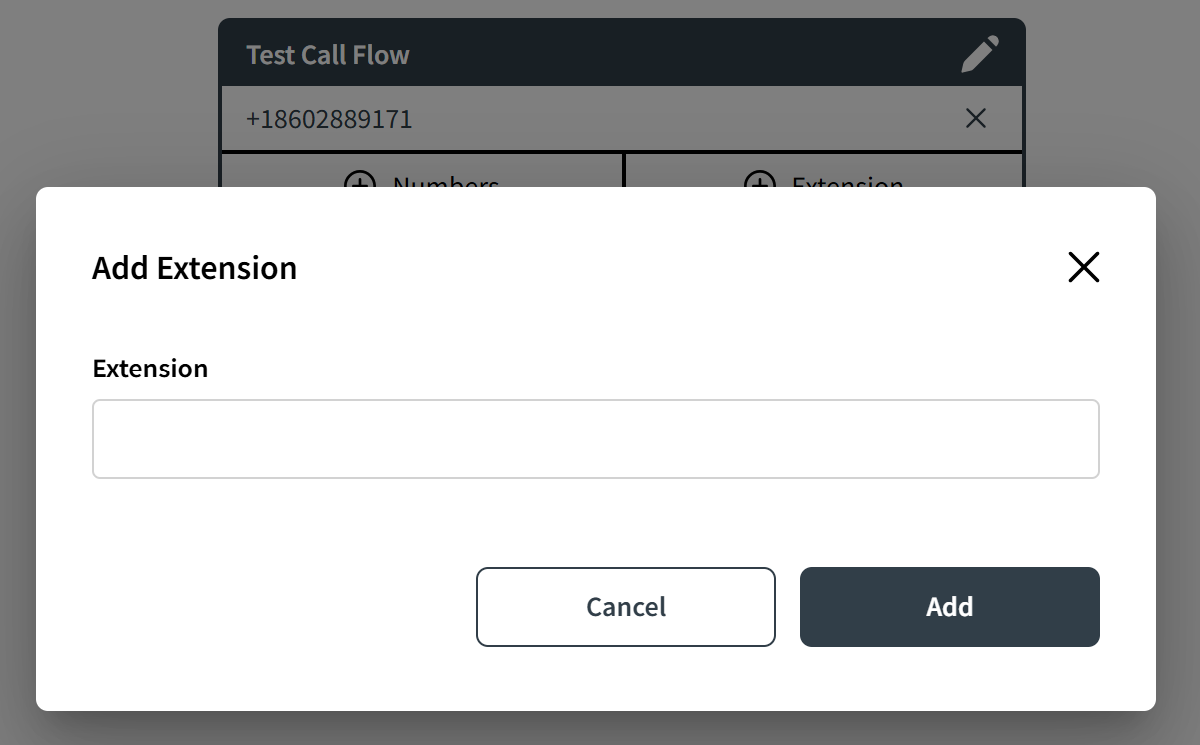
- Extension: upon clicking this option, another pop-up window will appear where you can enter any extension number that you want to be associated with the configured call flow.
Do not forget to press the "Save Changes" button in order to implement all of the modifications made to the call flow.

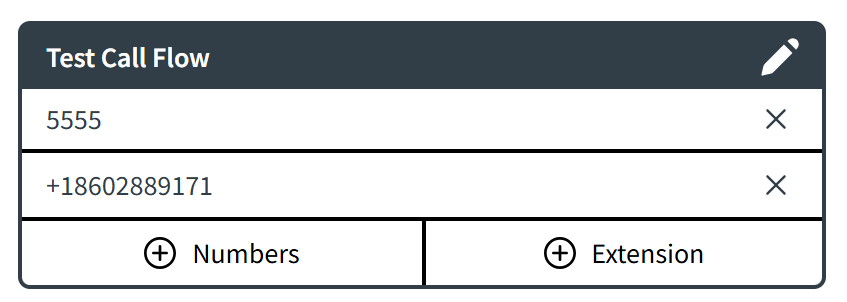
You have the option of linking numerous phone and extension numbers to the configured call flow. If you wish to add more numbers, the "Number" or "Extension" at the bottom of the Main Callflow Block. To remove a particular number from the call flow, simply click on the X icon located next to the number you wish to delete.
The Catalog of Actions
Within the section on the right-hand side of the Main Space of the Callflow Configurator, you will find a Catalog of Actions that can be used as functional Blocks in the design of a call flow.
By using the drag-and-drop technique, you can transfer the functional Blocks from the Catalog and integrate them into the Callflow diagram.
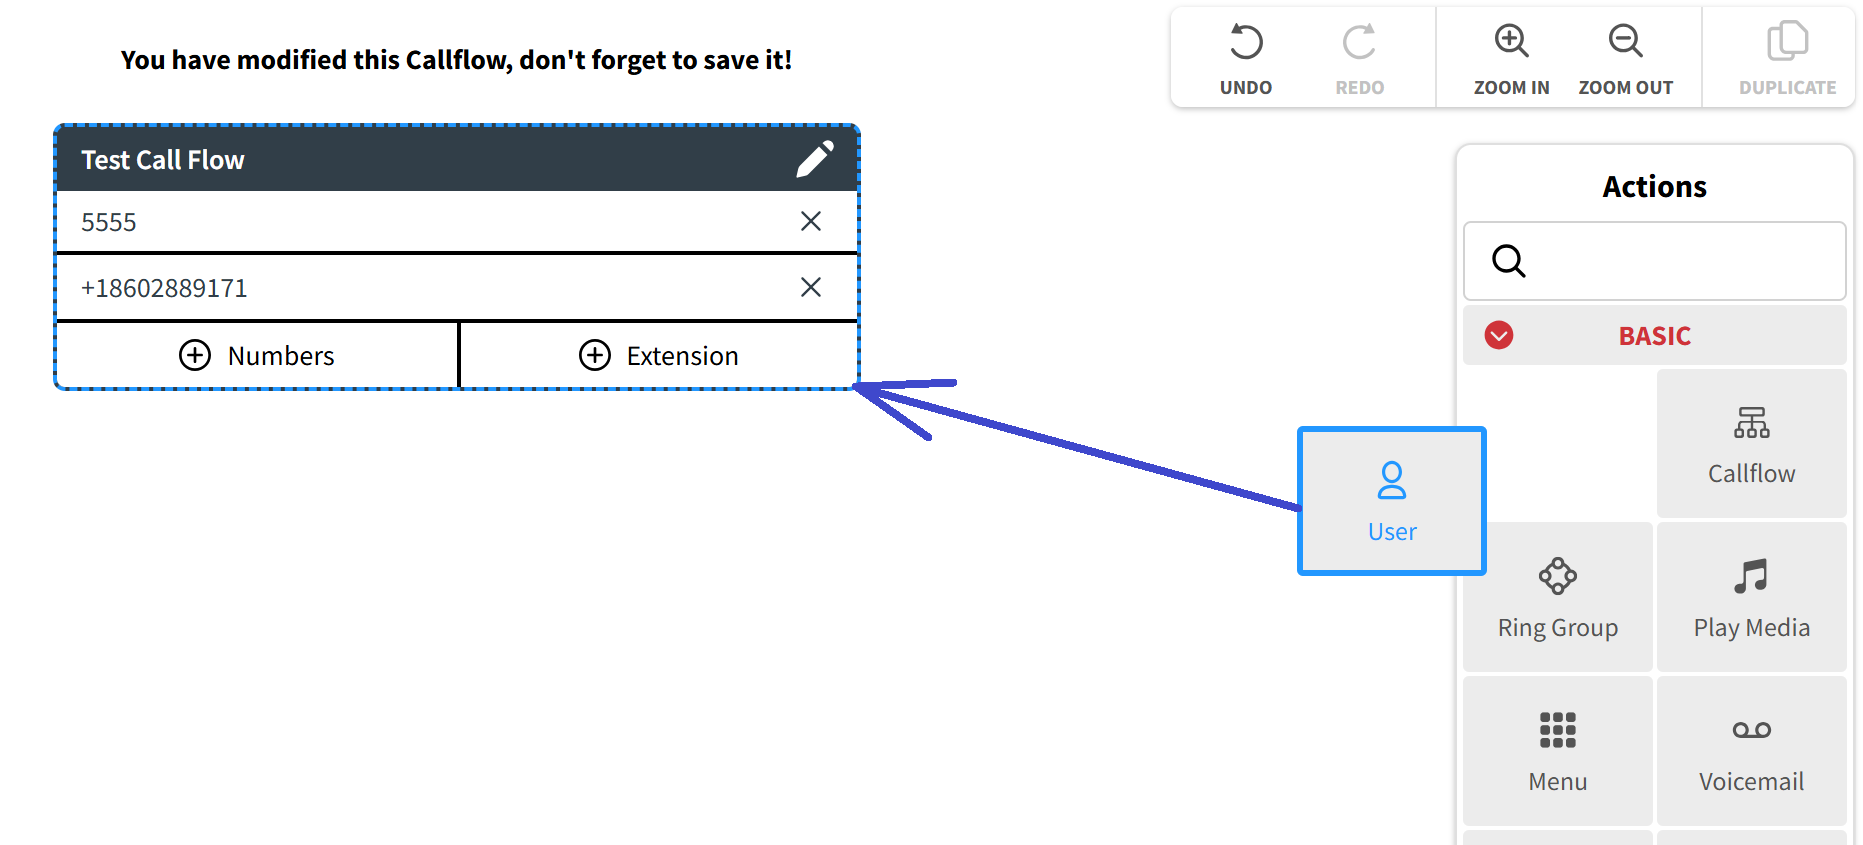
When you choose a Block from the Catalog and grab it with the left mouse button, certain elements within the Callflow diagram will be highlighted. These emphasized elements signify where the chosen Block can be implemented in the configured call flow.
Some Blocks can be inserted between other functional Blocks by dropping them onto the arrows that indicate the flow direction of the configured call flow.

When you drop a functional Block onto the Callflow diagram, a pop-up window will appear displaying the various parameters of the Block that need to be configured. As an illustration, the Voicemail Action Block configuration window can be viewed here as an example of such a pop-up window.

This call flow design aspect is highly dependent on your particular needs. You can customize the call flow by adding more Action Blocks.
Once changes in the Callflow diagram have been made, the "Save" button will become active, and clicking on it will open a drop-down menu with three saving options.

- Save Changes: by clicking this button, you will easily save all of the changes you have made.
- Save and Duplicate: clicking on this button will save all modifications made to the current call flow and create a new call flow that duplicates the original. The name of the duplicated call flow will include the name of the original call flow, followed by the word "copy".
- Save and Create: clicking on this button will save all modifications made to the current call flow and create a new empty call flow.
Was this article helpful?
That’s Great!
Thank you for your feedback
Sorry! We couldn't be helpful
Thank you for your feedback
Feedback sent
We appreciate your effort and will try to fix the article