Description: This is how the Ring Group Action works and how it can be integrated into call flows.
After creating a new call flow and completing the Main Callflow Block with essential information, you can implement a Ring Group to the configured call flow. The Ring Group Block is located within the Basic group of Actions in the Catalog of Actions on the Callflow Configurator's right-hand side.
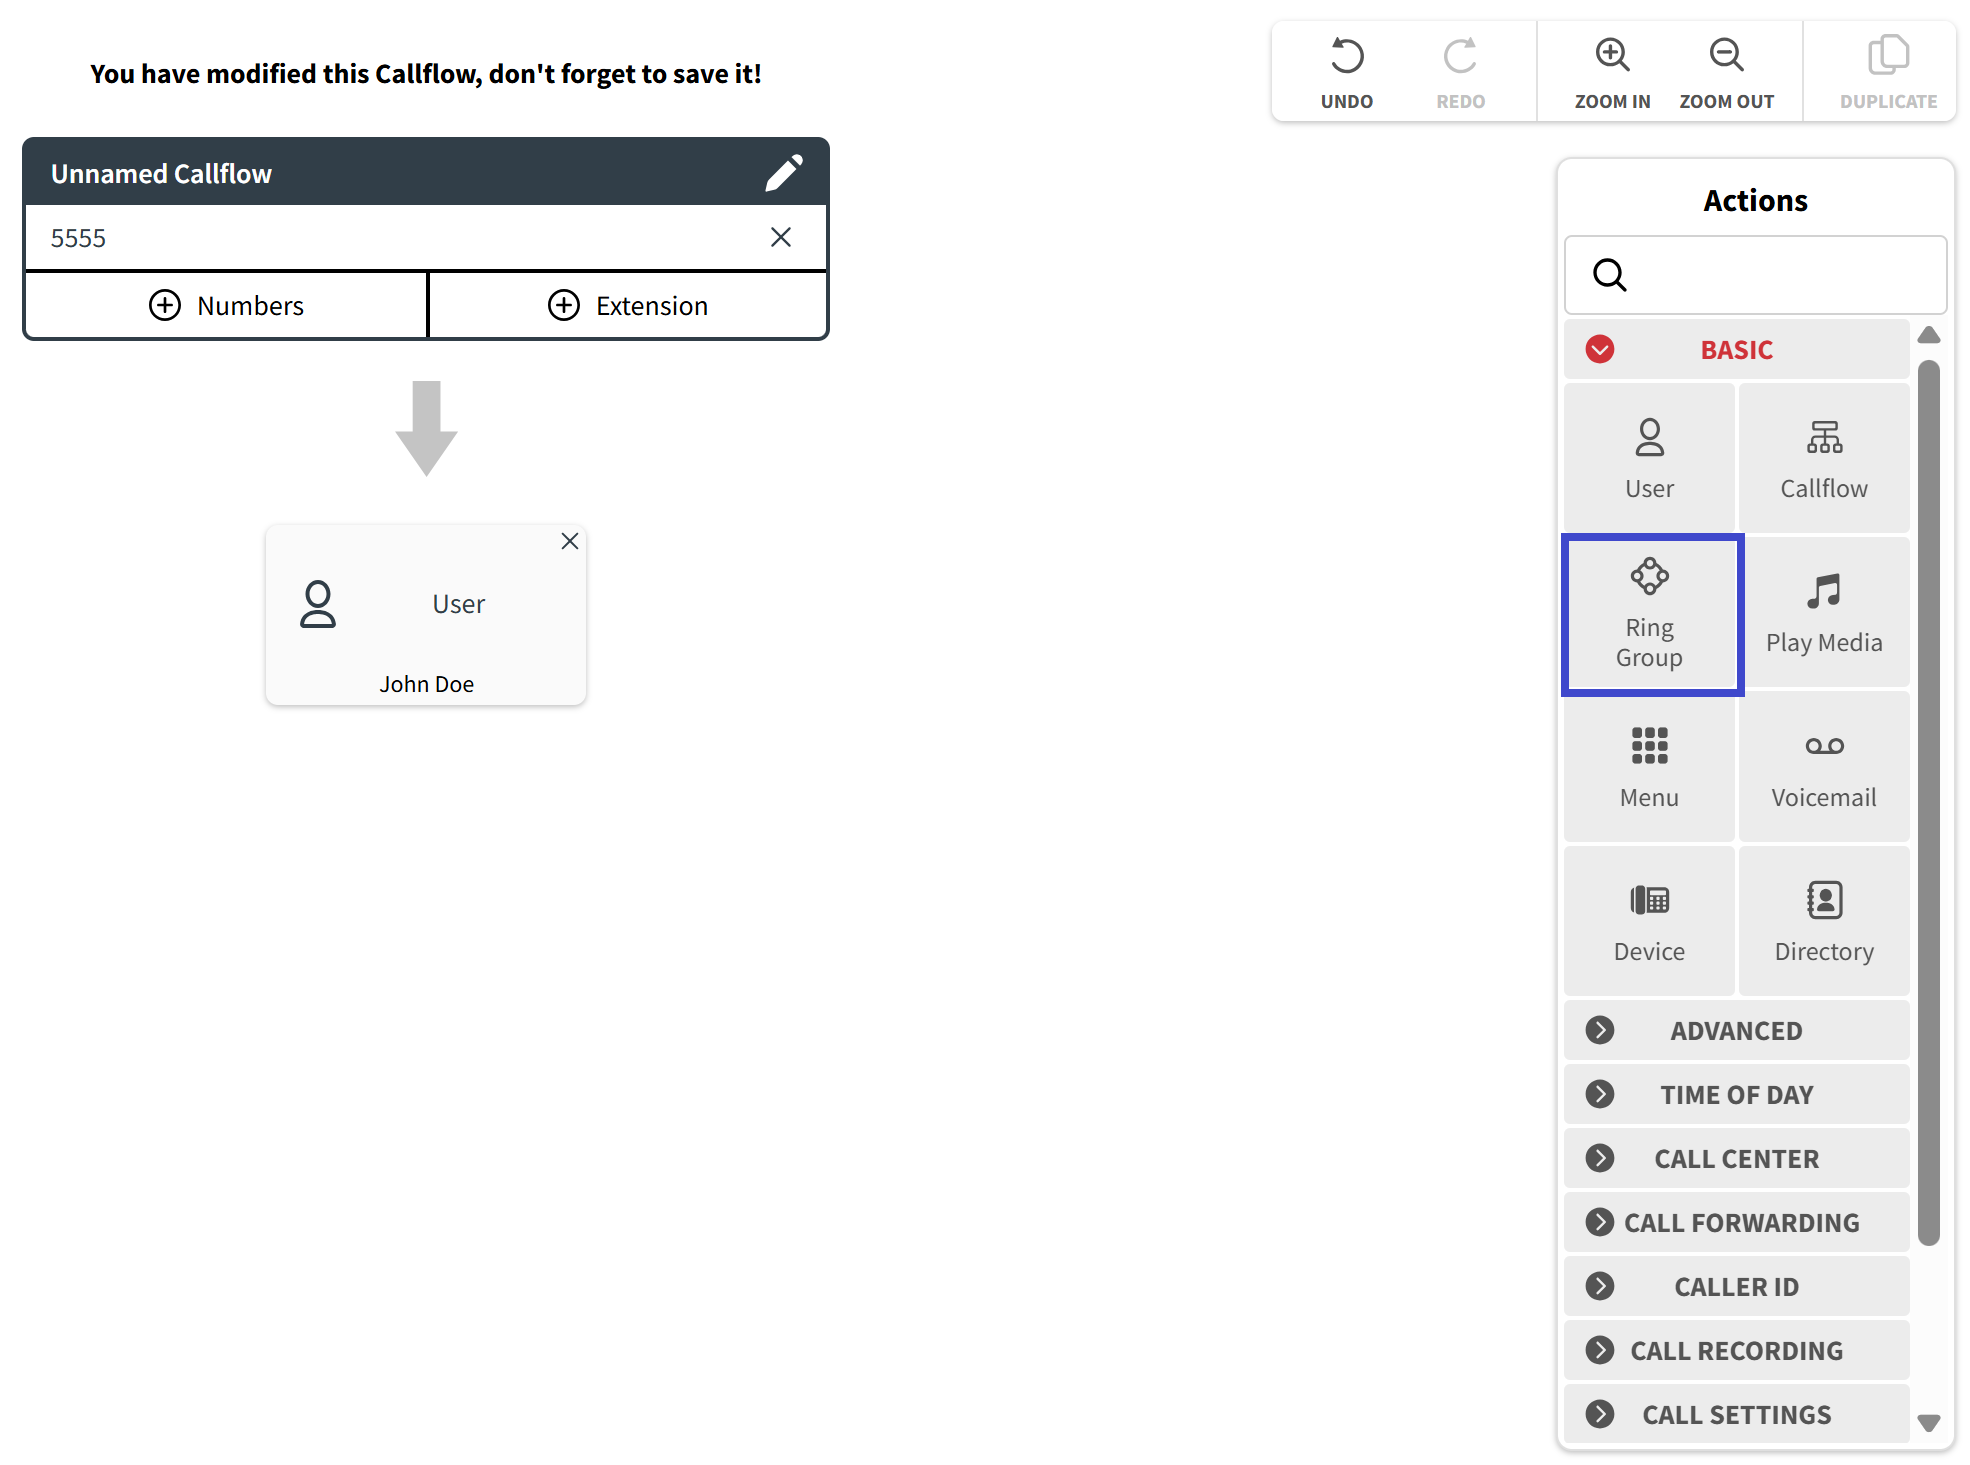
In a call flow designed for a contact center, a Ring Group is a feature that causes multiple agents' phones to ring simultaneously when a call is received. The first agent who answers the call will handle it, while the other phones will stop ringing.

This feature facilitates the prompt distribution of incoming calls, ensuring that they are dealt with efficiently.
By using the drag-and-drop technique, you can transfer the Ring Group Block from the Catalog and integrate them into several places of the Callflow diagram.
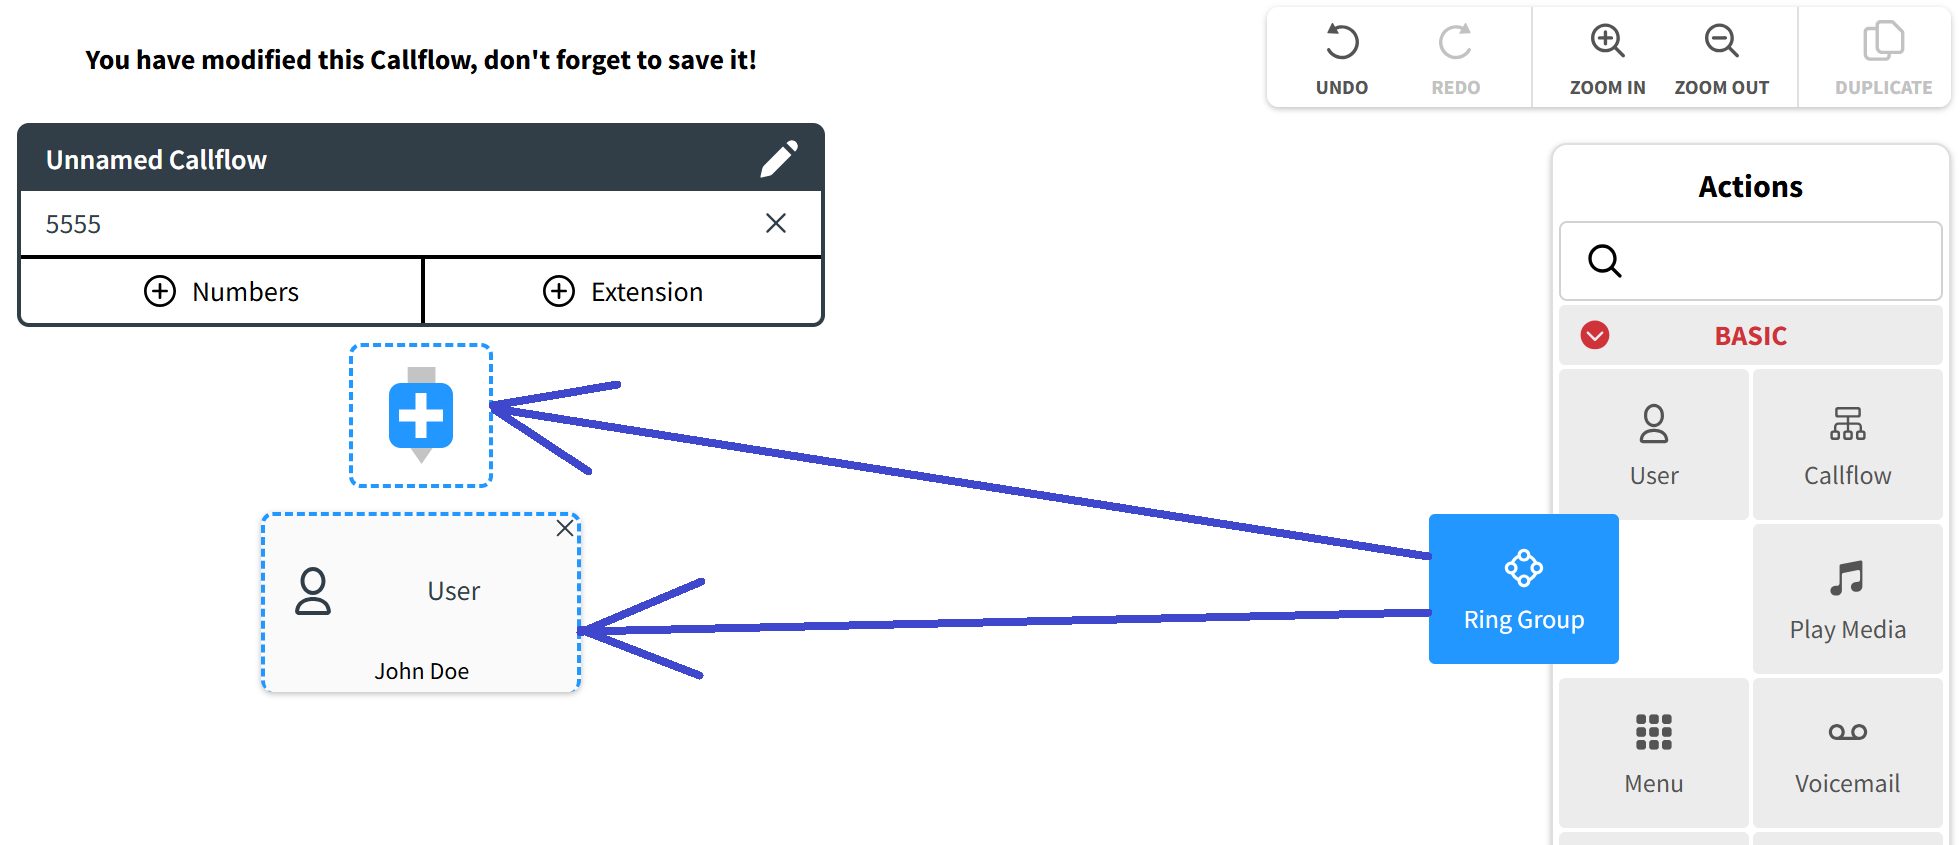
When you drop the Ring Group Block onto the Callflow diagram, a pop-up window will appear displaying the various parameters of the Block that need to be configured.
In practical terms, the fields in this window can be divided into two sections: the Primary Parameters of the Ring Group, and the Table of Members of the Ring Group.
Primary Parameters
Four parameters need to be configured in that section:
- Name this Ring Group: here, you can set a name for the configured Ring Group.

- Ring Strategy: if you click on this field, a drop-down menu will be displayed containing two Ring Group strategy options.

- At the same time: upon choosing this particular strategy, all members of the Ring Group will be notified of an incoming call simultaneously, and the first agent who answers the call will be responsible for managing it.
- In order: upon selecting this strategy, the members of the configured Ring Group will receive the call in the order in which they are arranged in the Table of Members (see below). The call will be transferred from one agent to another once the time specified in their Timeout(S) parameter has elapsed.
- Number of times to ring members: this parameter specifies the number of times a call will ring on each member of the Ring Group before being transferred further.
If the "Ring strategy" parameter is configured as "At the same time," all Ring Group members will simultaneously receive the incoming call for the duration set individually in their respective "Timeout" parameters. The repetitions will follow the duration of the longest Timeout among all Ring Group members. If a member has a lower "Timeout" parameter than the maximum, their call will conclude based on their Timeout. However, during repetitions, the member with the maximum Timeout will experience uninterrupted calls, while all other members will receive the call again, with intervals between repetitions.
If the "Ring strategy" parameter is set to "In order," each Ring Group member will receive an incoming call in the sequence specified in the Table of Members. Each member will have the call for the duration set individually in their "Timeout" parameters. Repetitions occur as the call cycles through all members of the Ring Group, returning to the beginning of the member list.
- Ringback: by clicking on this field, you will see a drop-down menu containing various pre-set media options that can be used as a greeting message.

If the list is empty, you can create a new media file for this purpose by clicking the "Create Media" button. This action will trigger a series of pop-up windows where you can configure the parameters for the new media file. The process of configuring new media files is explained in this article.
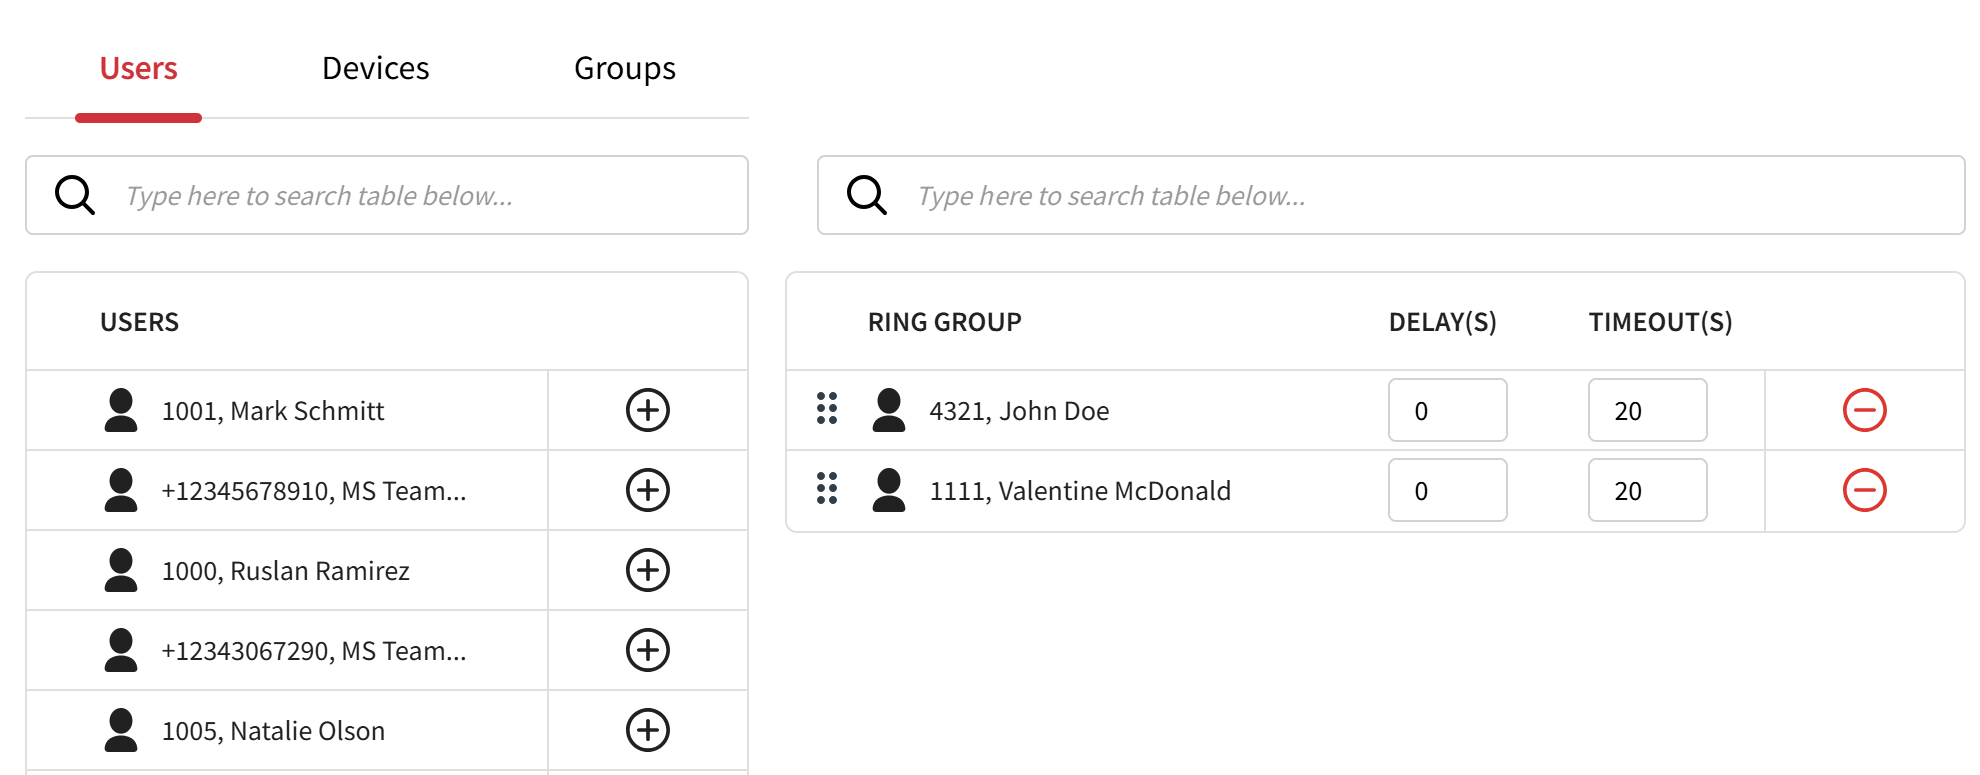
Table of Members
There are three tabs in the table, and each tab follows the same format. The left-hand side displays a list of Users, Devices, or Groups that have been created under the user's account, while the right-hand side remains blank, indicating the current members of the configured Ring Group. By clicking on the plus icon located next to each User, Device, or Group, that entry will shift to the right side of the table. To move a member of the Ring Group back to the list of vacant members on the left side, you can click on the minus icon.
All three categories of members can be included in the Ring Group.
To rearrange the lines in this table, employ the drag-and-drop method by clicking and holding the six-dot icon of each line and moving it up or down the list.
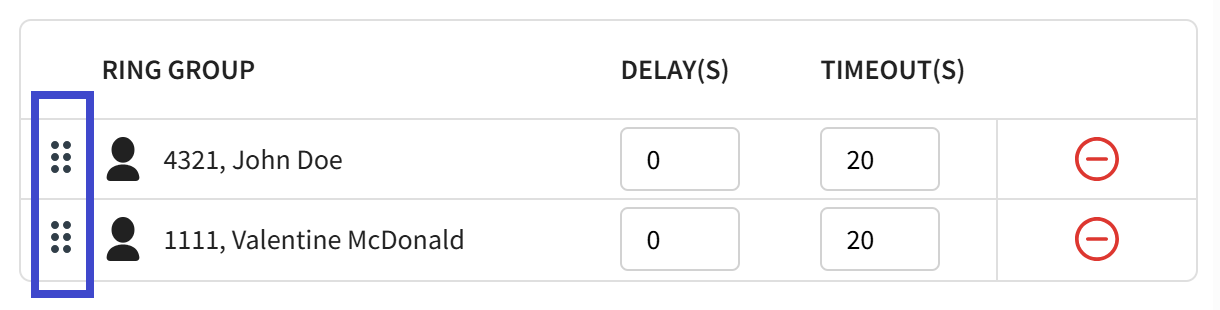
The sequence of members in the configured Ring Group is significant only when the "Ring Group Strategy" parameter mentioned in the Primary Parameters section is defined as "In order".
For each User, Device, or Group on the right side of the table, there are two fields that need to be configured:
- Delay(S): this parameter specifies the time duration before the call is forwarded to an agent, allowing the system to wait for a specific time before initiating the call transfer. The time is specified in seconds. The default value for this parameter is 0 seconds.
If the Delay(S) parameter is set to 0 seconds, the call transfer will occur immediately. - Timeout: this parameter specifies the time duration for which the call should ring at a User, Device, or Group before it is directed to another member of the configured Ring Group. It helps ensure that calls are not left unanswered for extended periods, improving customer satisfaction. The time is specified in seconds. The default value for this parameter is 20 seconds.
A properly configured Ring Group integrated into a call flow will be displayed as follows.
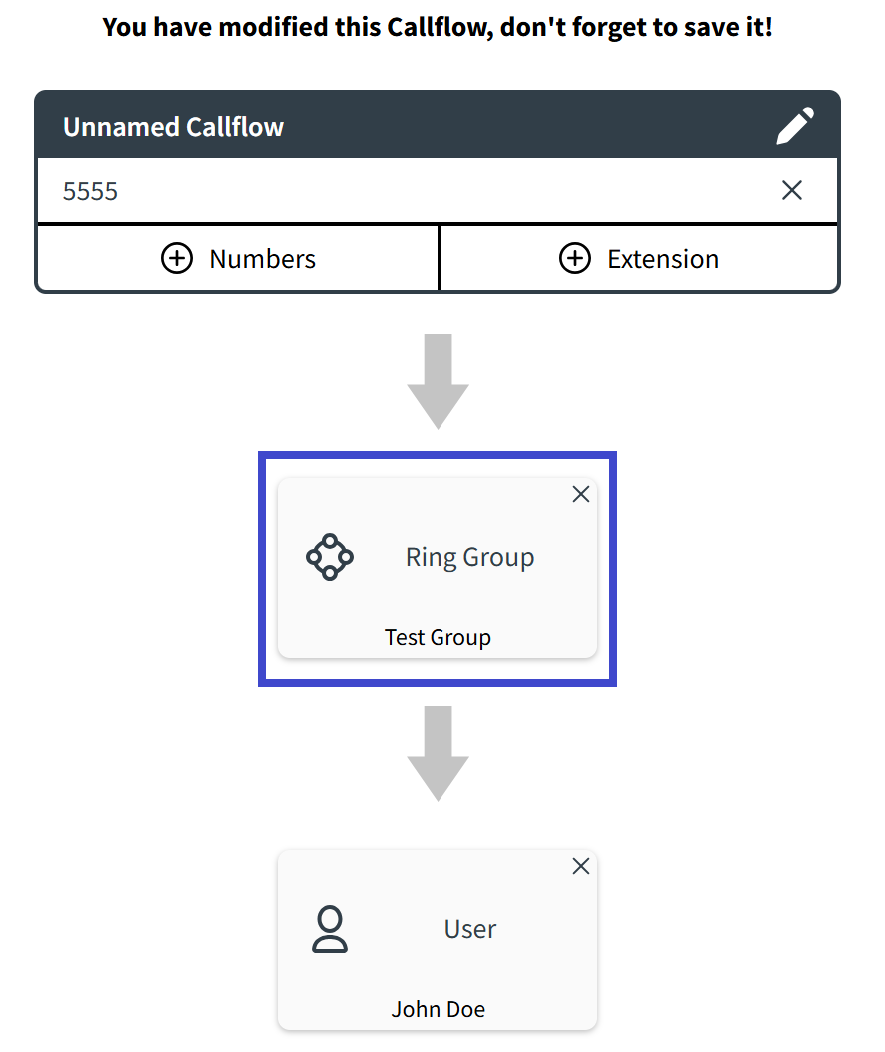
Within the Block, you will be able to see the Name of the Ring Group.
Once changes in the Callflow diagram have been made, the "Save" button will become active, and clicking on it will open a drop-down menu with three saving options.

- Save Changes: by clicking this button, you will easily save all of the changes you have made.
- Save and Duplicate: clicking on this button will save all modifications made to the current call flow and create a new call flow that duplicates the original. The name of the duplicated call flow will include the name of the original call flow, followed by the word "copy".
- Save and Create: clicking on this button will save all modifications made to the current call flow and create a new empty call flow.
- Cancel: clicking on this button will cancel any modifications made to the call flow. If changes have been made, the system will prompt you to confirm the cancellation of those changes.

Was this article helpful?
That’s Great!
Thank you for your feedback
Sorry! We couldn't be helpful
Thank you for your feedback
Feedback sent
We appreciate your effort and will try to fix the article