Description: This is how the Queue Action works and how it can be integrated into call flows.
After creating a new call flow, completing the Main Callflow Block with essential information, and assigning a Device to the configured call flow, you can implement a Queue to the configured call flow. The Queue Block is located within the Call Center group of Actions in the Catalog of Actions on the Callflow Configurator's right-hand side.
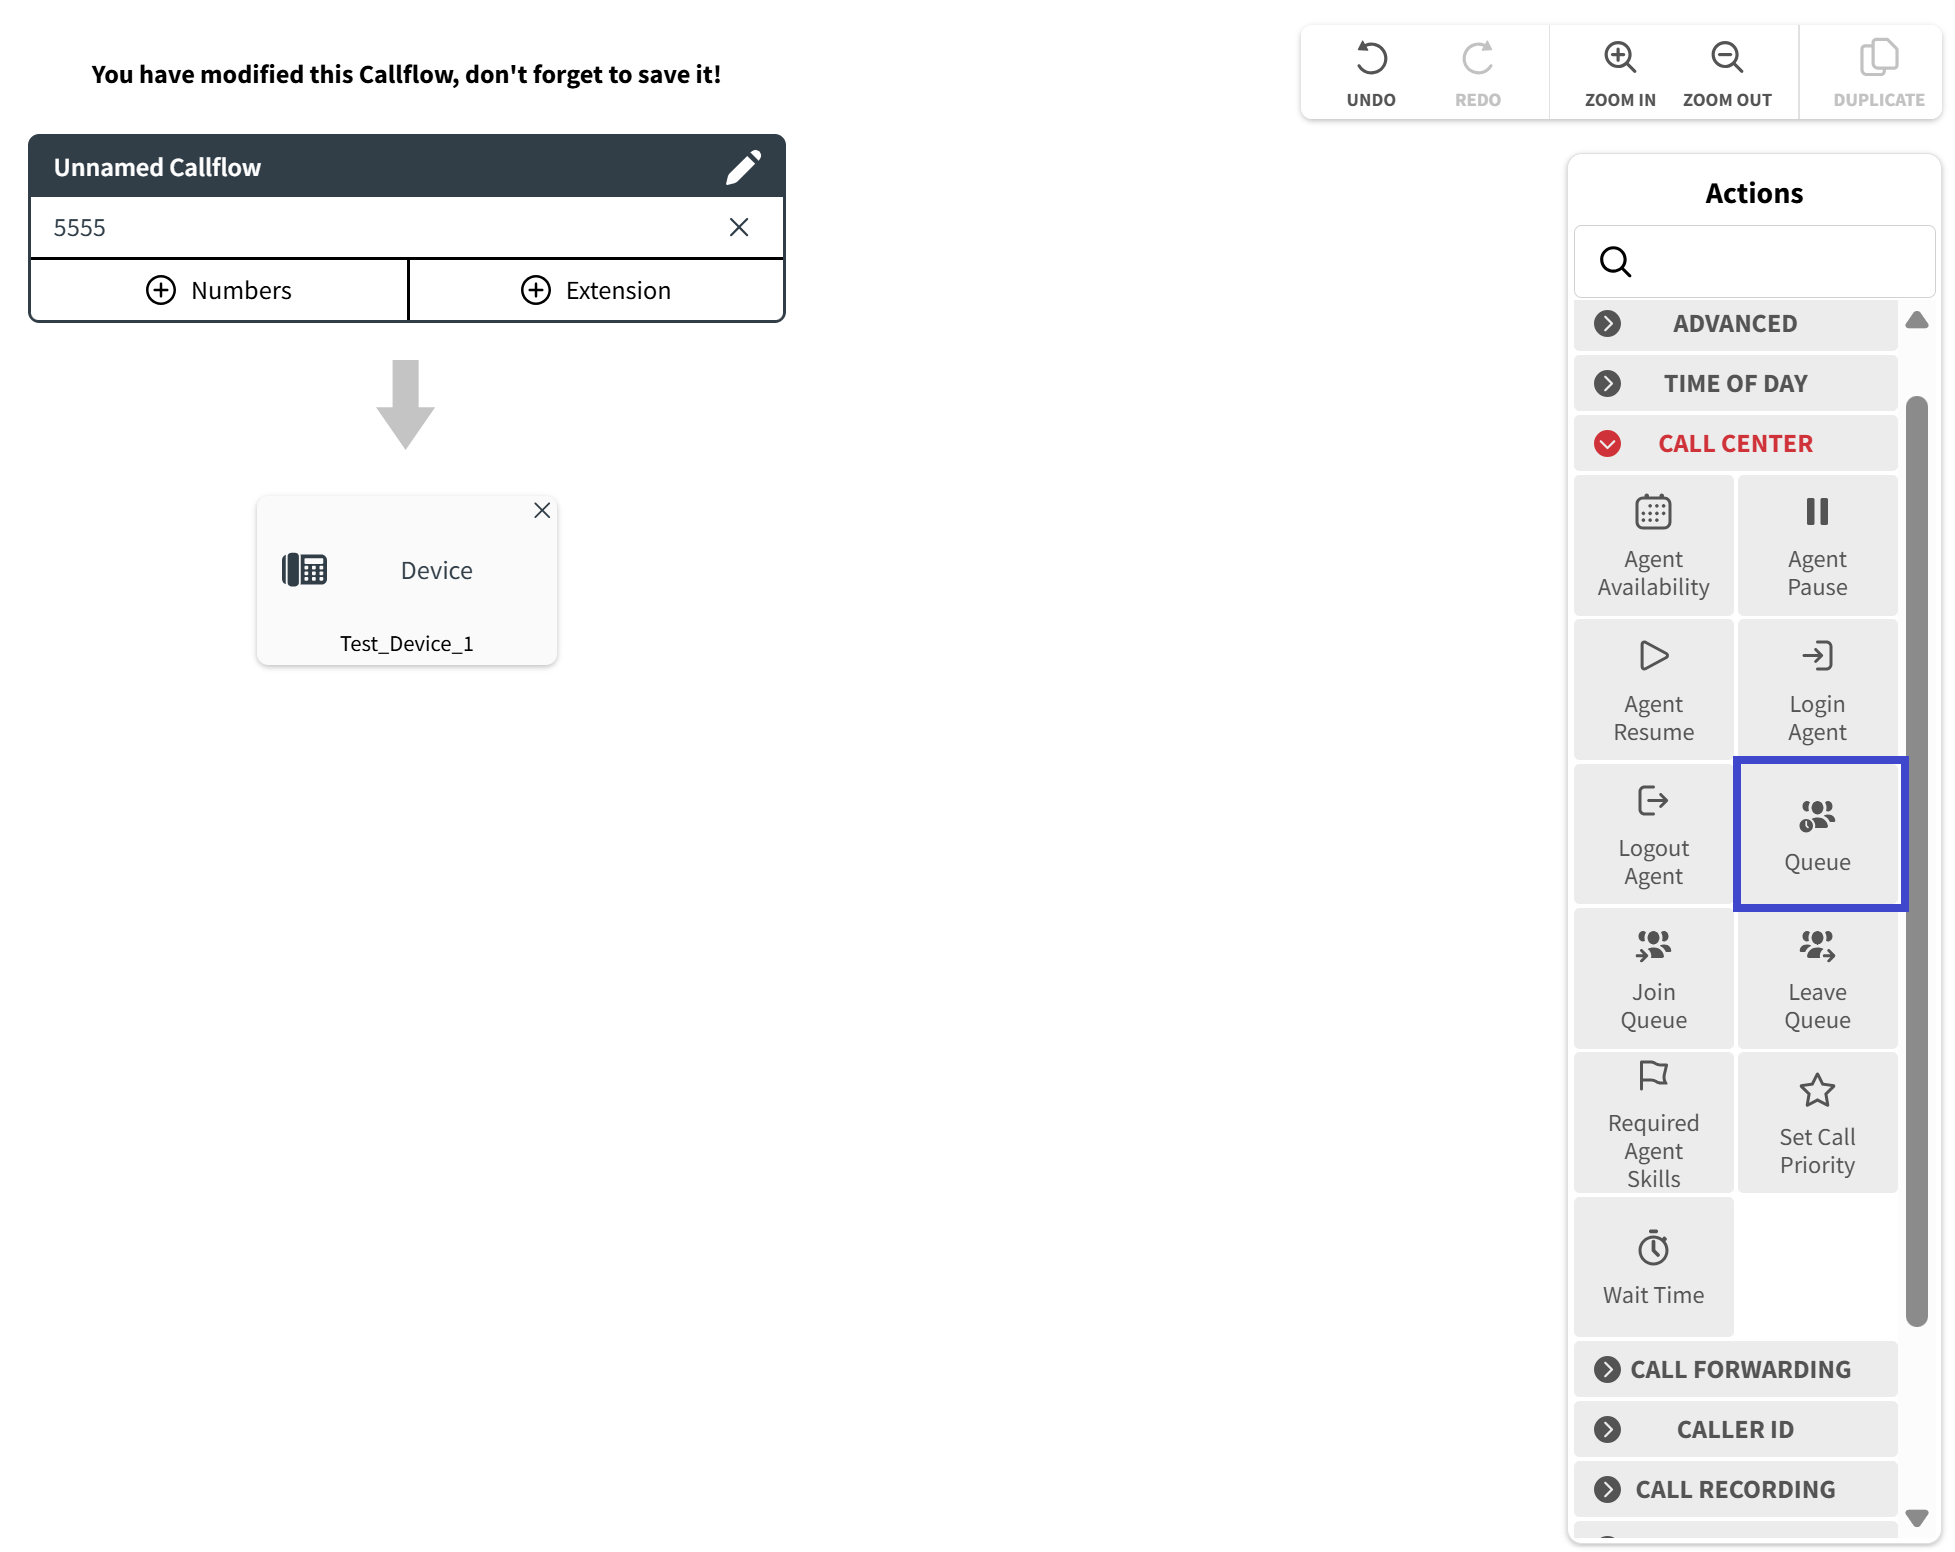
The Queue Action is used to route incoming calls to a specific queue, which can then be handled by agents or a group of agents.

When a caller reaches this element in a call flow, they will be placed in a queue and given a position in the queue.
By using the drag-and-drop technique, you can transfer the Queue Block from the Catalog and integrate them into several places of the Callflow diagram depending on your design of the call flow.
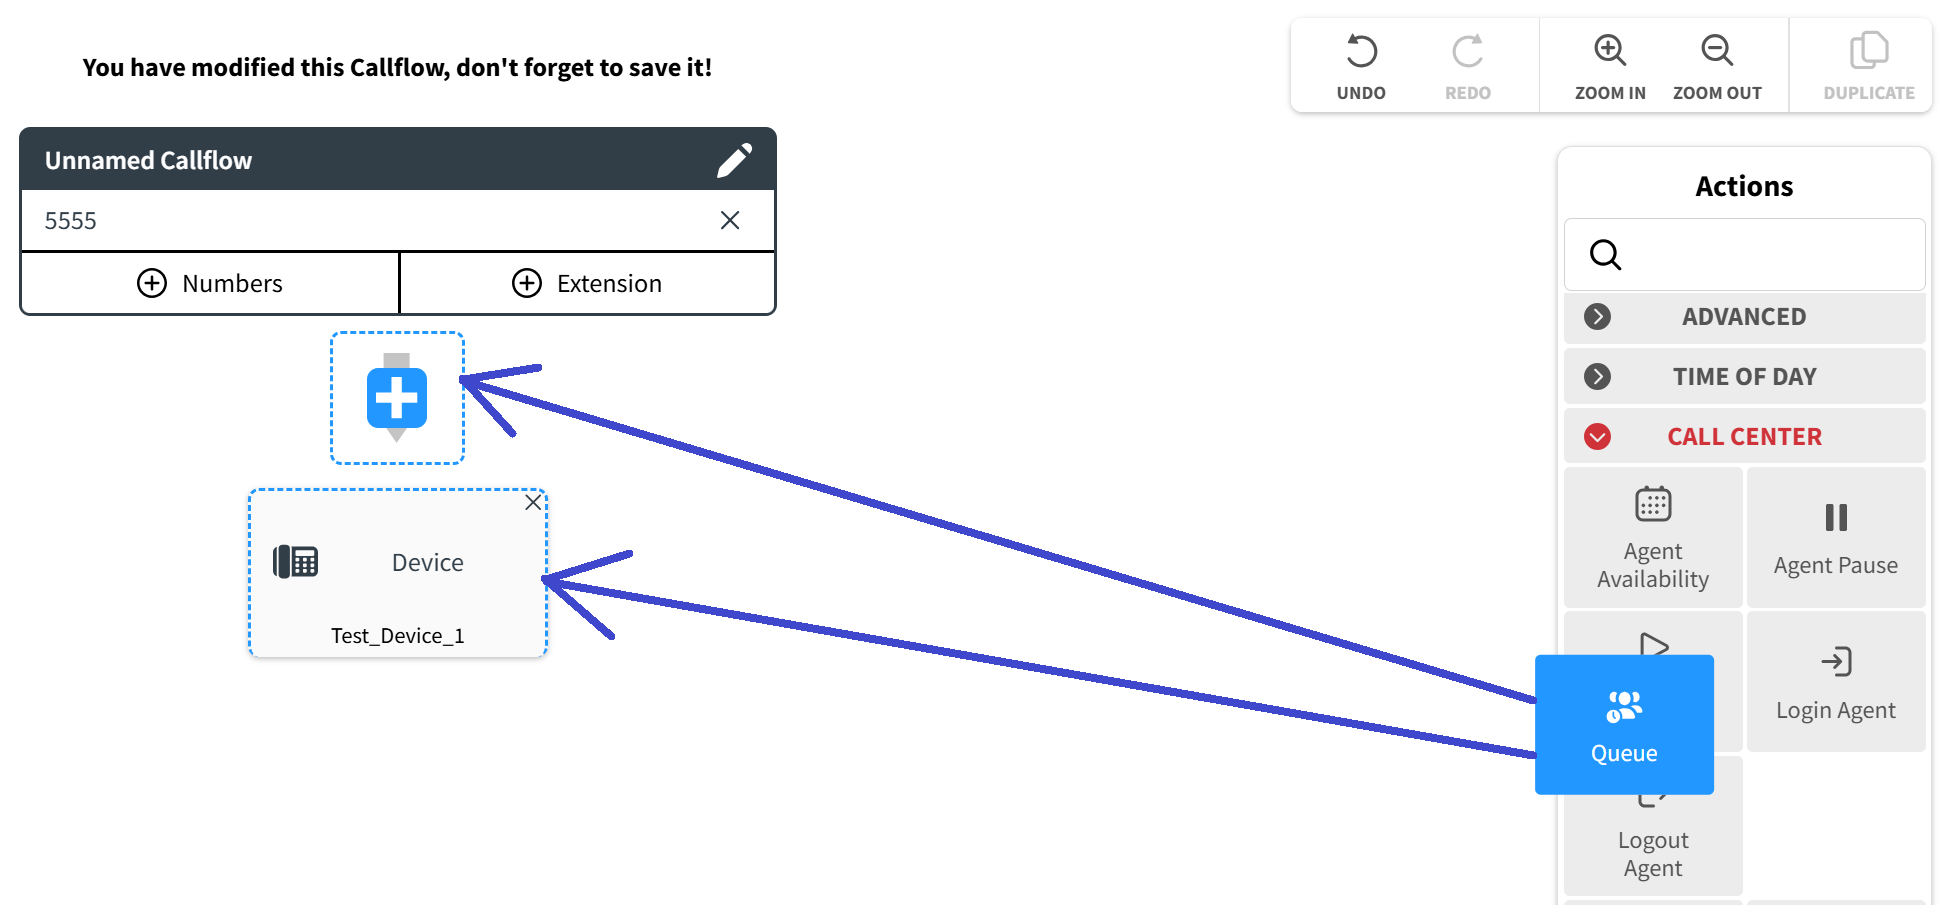
When you drop the Queue Block onto the Callflow diagram, a pop-up window will appear displaying the various parameters of the Block that need to be configured. 
Three parameters need to be configured in that section:
- Queue: when you click on this field, a drop-down menu will be displayed, containing all the Queues you have created in the Call Center App.
- Enter as Callback: if this parameter is enabled, the caller will be given the option to request a callback instead of waiting on hold.
- Route to Another Queue: if you check this box, a new field will be displayed where you can input a custom variable that directs to a specific queue.

A properly configured Queue Block integrated into a call flow will be displayed as follows.
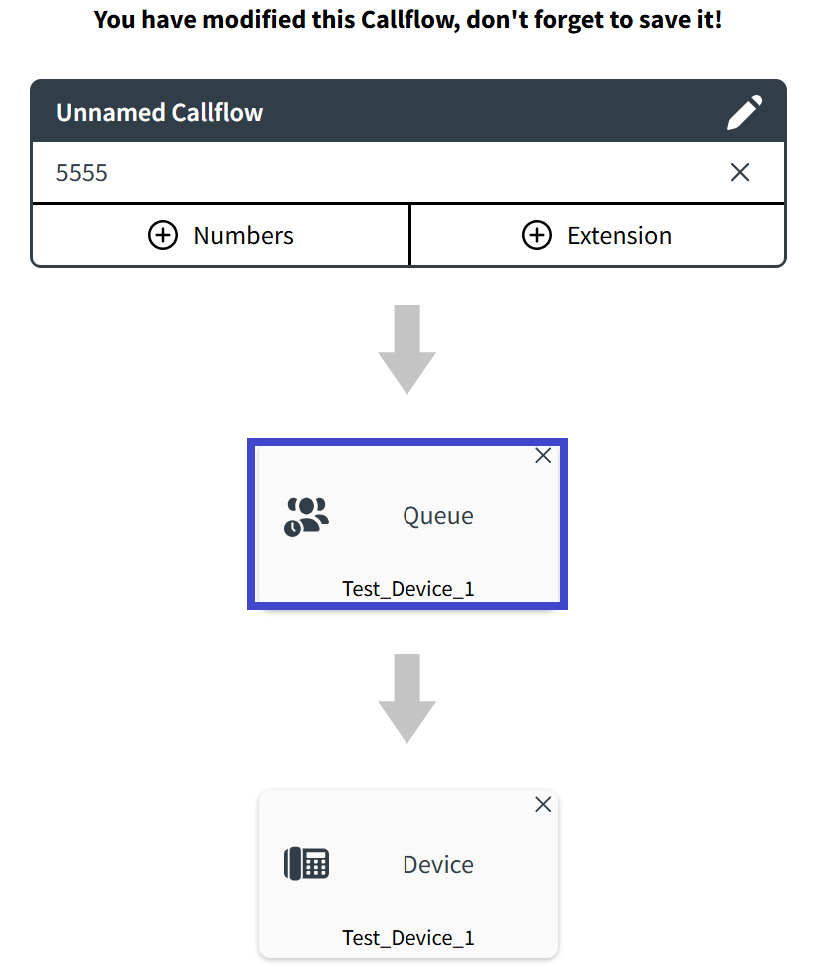
Not only will you be able to view the Queue within the Block, but also any parameters for which you have selected checkboxes.
Once changes in the Callflow diagram have been made, the "Save" button will become active, and clicking on it will open a drop-down menu with three saving options.

- Save Changes: by clicking this button, you will easily save all of the changes you have made.
- Save and Duplicate: clicking on this button will save all modifications made to the current call flow and create a new call flow that duplicates the original. The name of the duplicated call flow will include the name of the original call flow, followed by the word "copy".
- Save and Create: clicking on this button will save all modifications made to the current call flow and create a new empty call flow.
- Cancel: clicking on this button will cancel any modifications made to the call flow. If changes have been made, the system will prompt you to confirm the cancellation of those changes.

- Cancel: clicking on this button will cancel any modifications made to the call flow. If changes have been made, the system will prompt you to confirm the cancellation of those changes.
Was this article helpful?
That’s Great!
Thank you for your feedback
Sorry! We couldn't be helpful
Thank you for your feedback
Feedback sent
We appreciate your effort and will try to fix the article