Description: This is how the Wait Time Action works and how it can be integrated into call flows.
Like the Queue Action, the Wait Time Action also routes an incoming call to a specific queue. The distinction is that the Wait Time Action allows you to set a timeframe for agents to answer a call instead of instantly sending it to the call flow.After creating a new call flow, and completing the Main Callflow Block with essential information, you can implement the Wait Time Action to the configured call flow. The Wait Time Block is located within the Call Center group of Actions in the Catalog of Actions on the Callflow Configurator's right-hand side.
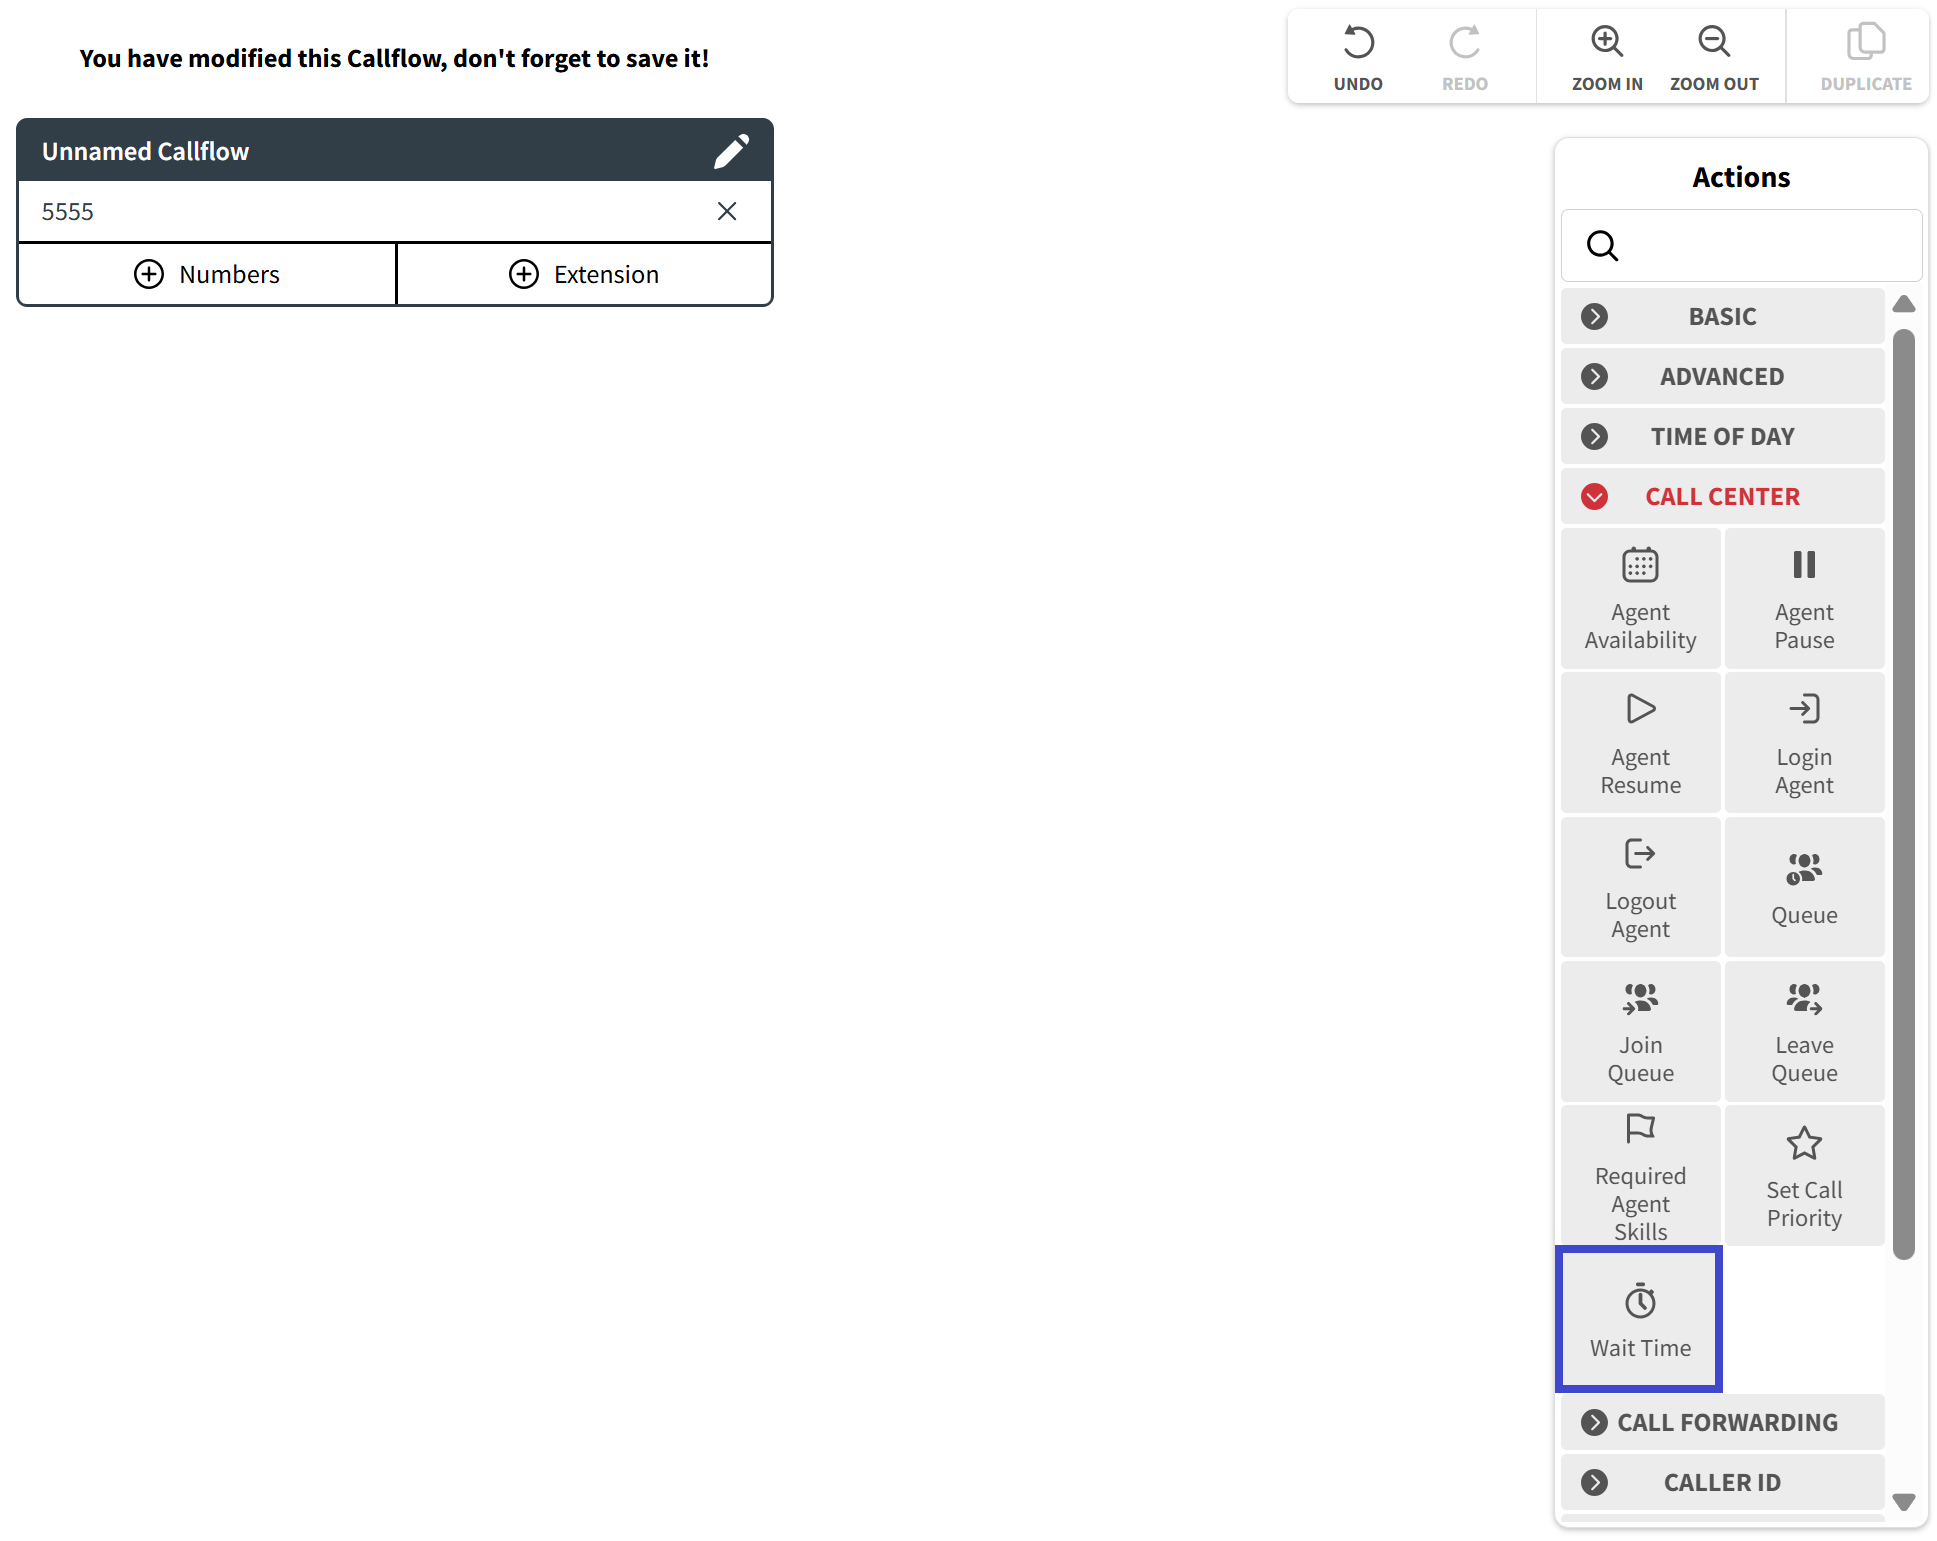
By using the drag-and-drop technique, you can transfer the Wait Time Block from the Catalog and integrate them into several places of the Callflow diagram.
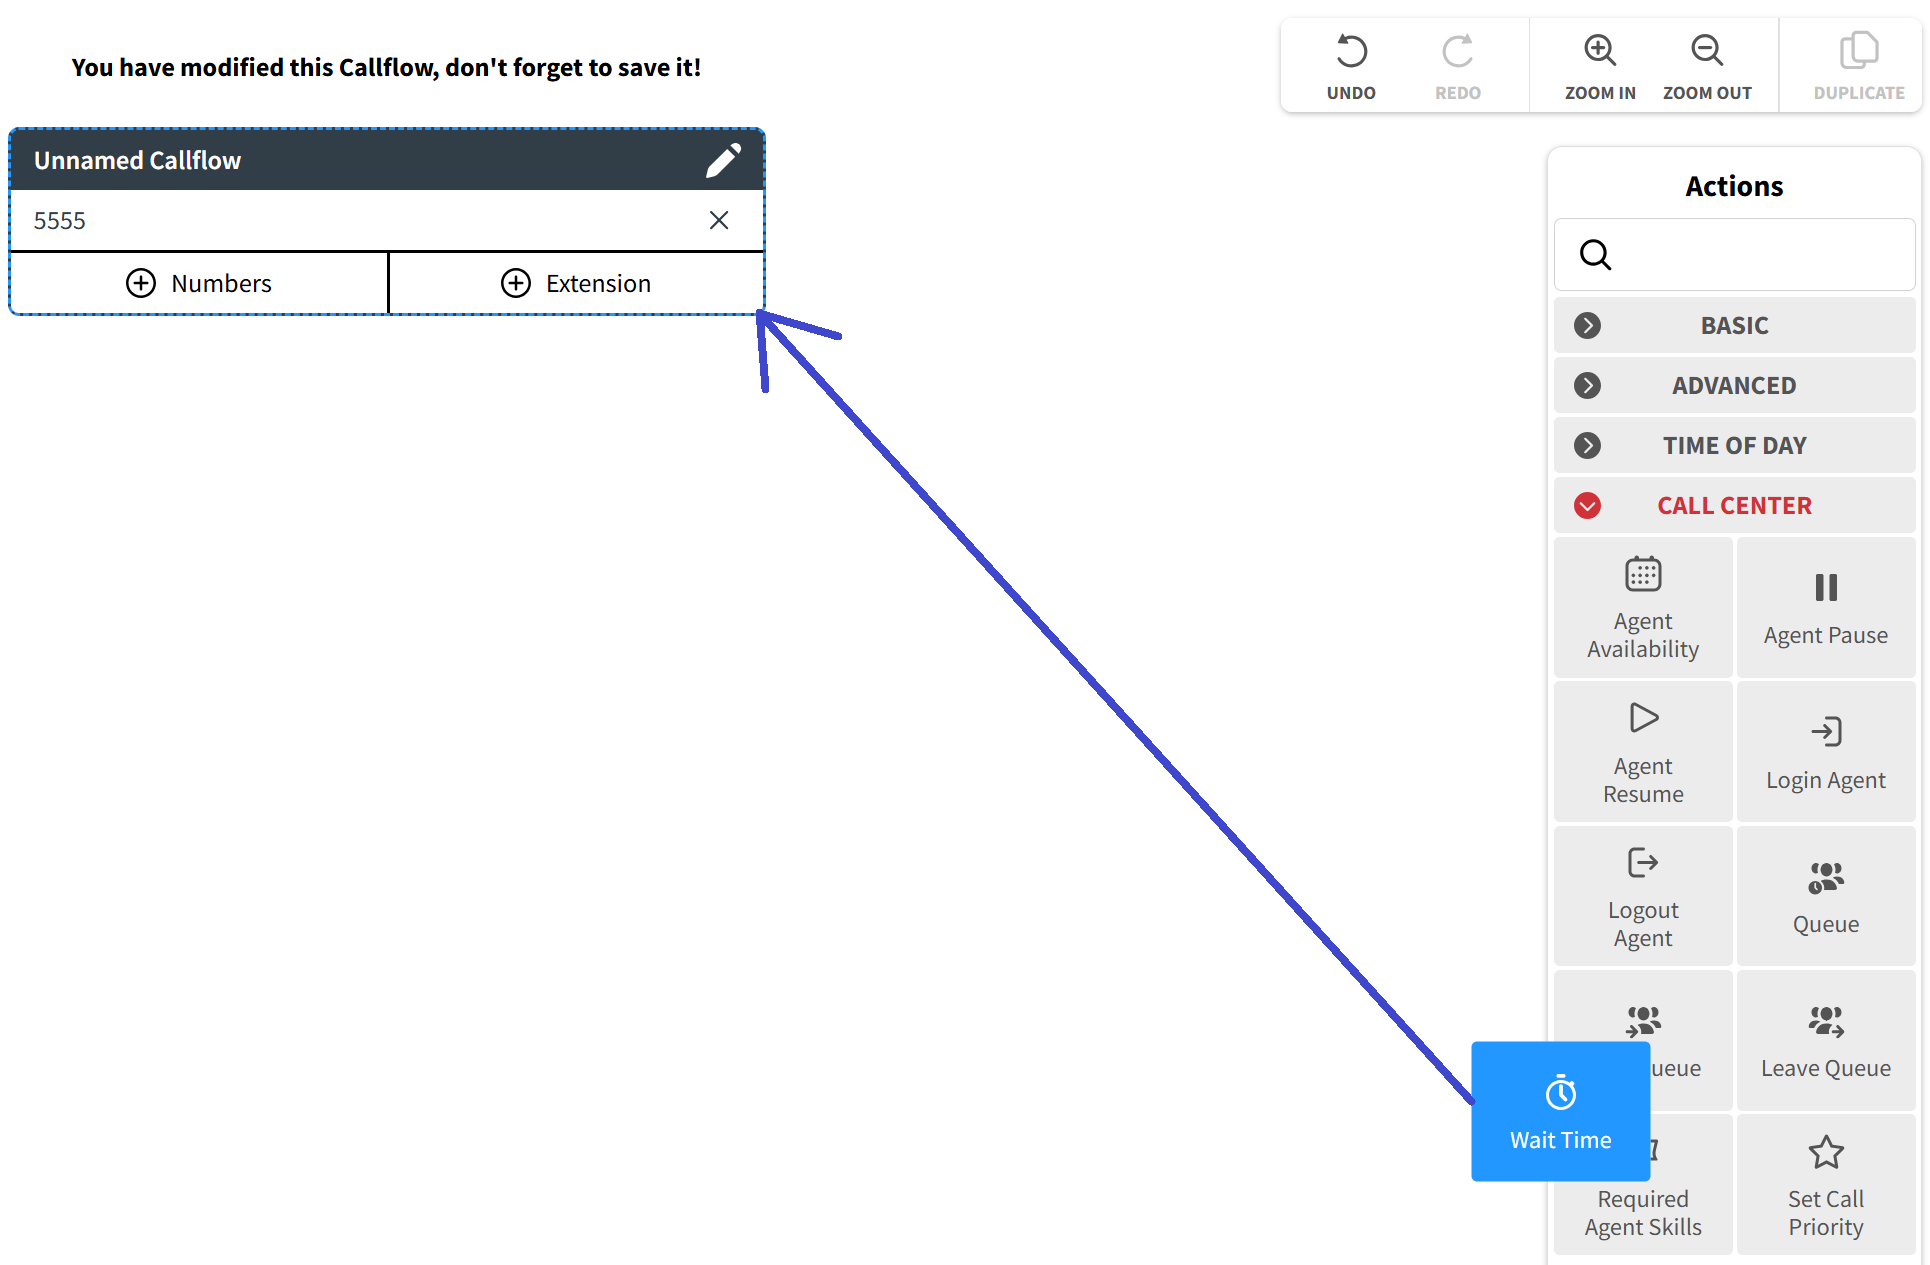
When you drop the Wait Time Block onto the Callflow diagram, a pop-up window will appear displaying the various parameters of the Block that need to be configured.

Three parameters need to be configured in that section:
- Queue: when you click on this field, a drop-down menu will be displayed, containing all the Queues you have access.
The Call Center App is used to manage queues, where an administrator can easily add or remove agents from a queue.- Window: these fields can be used to set a timeframe during which the average waiting time is calculated. Select the units of measurement for the waiting time (hours or minutes) from the drop-down list and use the first field to enter the time value in the chosen units of measurement.

- Route to Another Queue: if you check this box, a new field will be displayed where you can input a custom variable that directs to a specific queue.

A Variable is a parameter that is used in call routing for directing a call to a specific destination, such as a queue, voicemail box, device, menu, etc., by using the information transmitted with the call.
A properly configured Leave Queue Block integrated into a call flow will be displayed as follows.
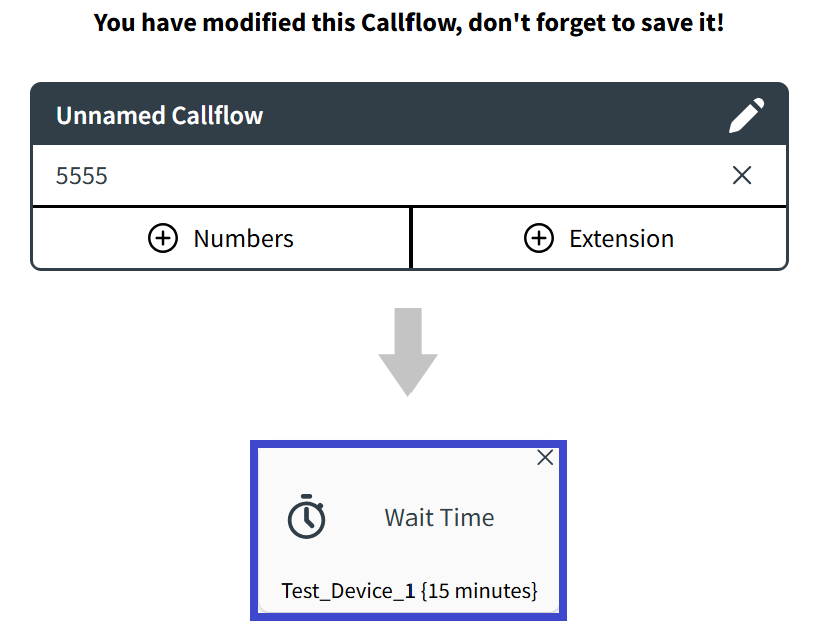
Within the Block, you can find information about the selected queue and the waiting time you set.
Once changes in the Callflow diagram have been made, the "Save" button will become active, and clicking on it will open a drop-down menu with three saving options.

- Save Changes: by clicking this button, you will easily save all of the changes you have made.
- Save and Duplicate: clicking on this button will save all modifications made to the current call flow and create a new call flow that duplicates the original. The name of the duplicated call flow will include the name of the original call flow, followed by the word "copy".
- Save and Create: clicking on this button will save all modifications made to the current call flow and create a new empty call flow.
- FCancel: clicking on this button will cancel any modifications made to the call flow. If changes have been made, the system will prompt you to confirm the cancellation of those changes.

Was this article helpful?
That’s Great!
Thank you for your feedback
Sorry! We couldn't be helpful
Thank you for your feedback
Feedback sent
We appreciate your effort and will try to fix the article