Description: This is how the Enable Call Forwarding, Disable Call Forwarding, and Update Call Forwarding Actions work and how they can be integrated into call flows.
Call Forwarding is a feature that enables users to reroute calls directed to their Users to an alternative destination, such as a different phone number.
The Call Forwarding Action Blocks discussed in this article are designed to manipulate the Call Forward parameters of the User.
For details on the Call Routing Section of User's parameters, refer to the article accessible through this link.
When setting up a User, the Call Forward parameters can be found under the Call Routing subtab within the User tab. On this subtab, you can adjust two parameters using Action Blocks.
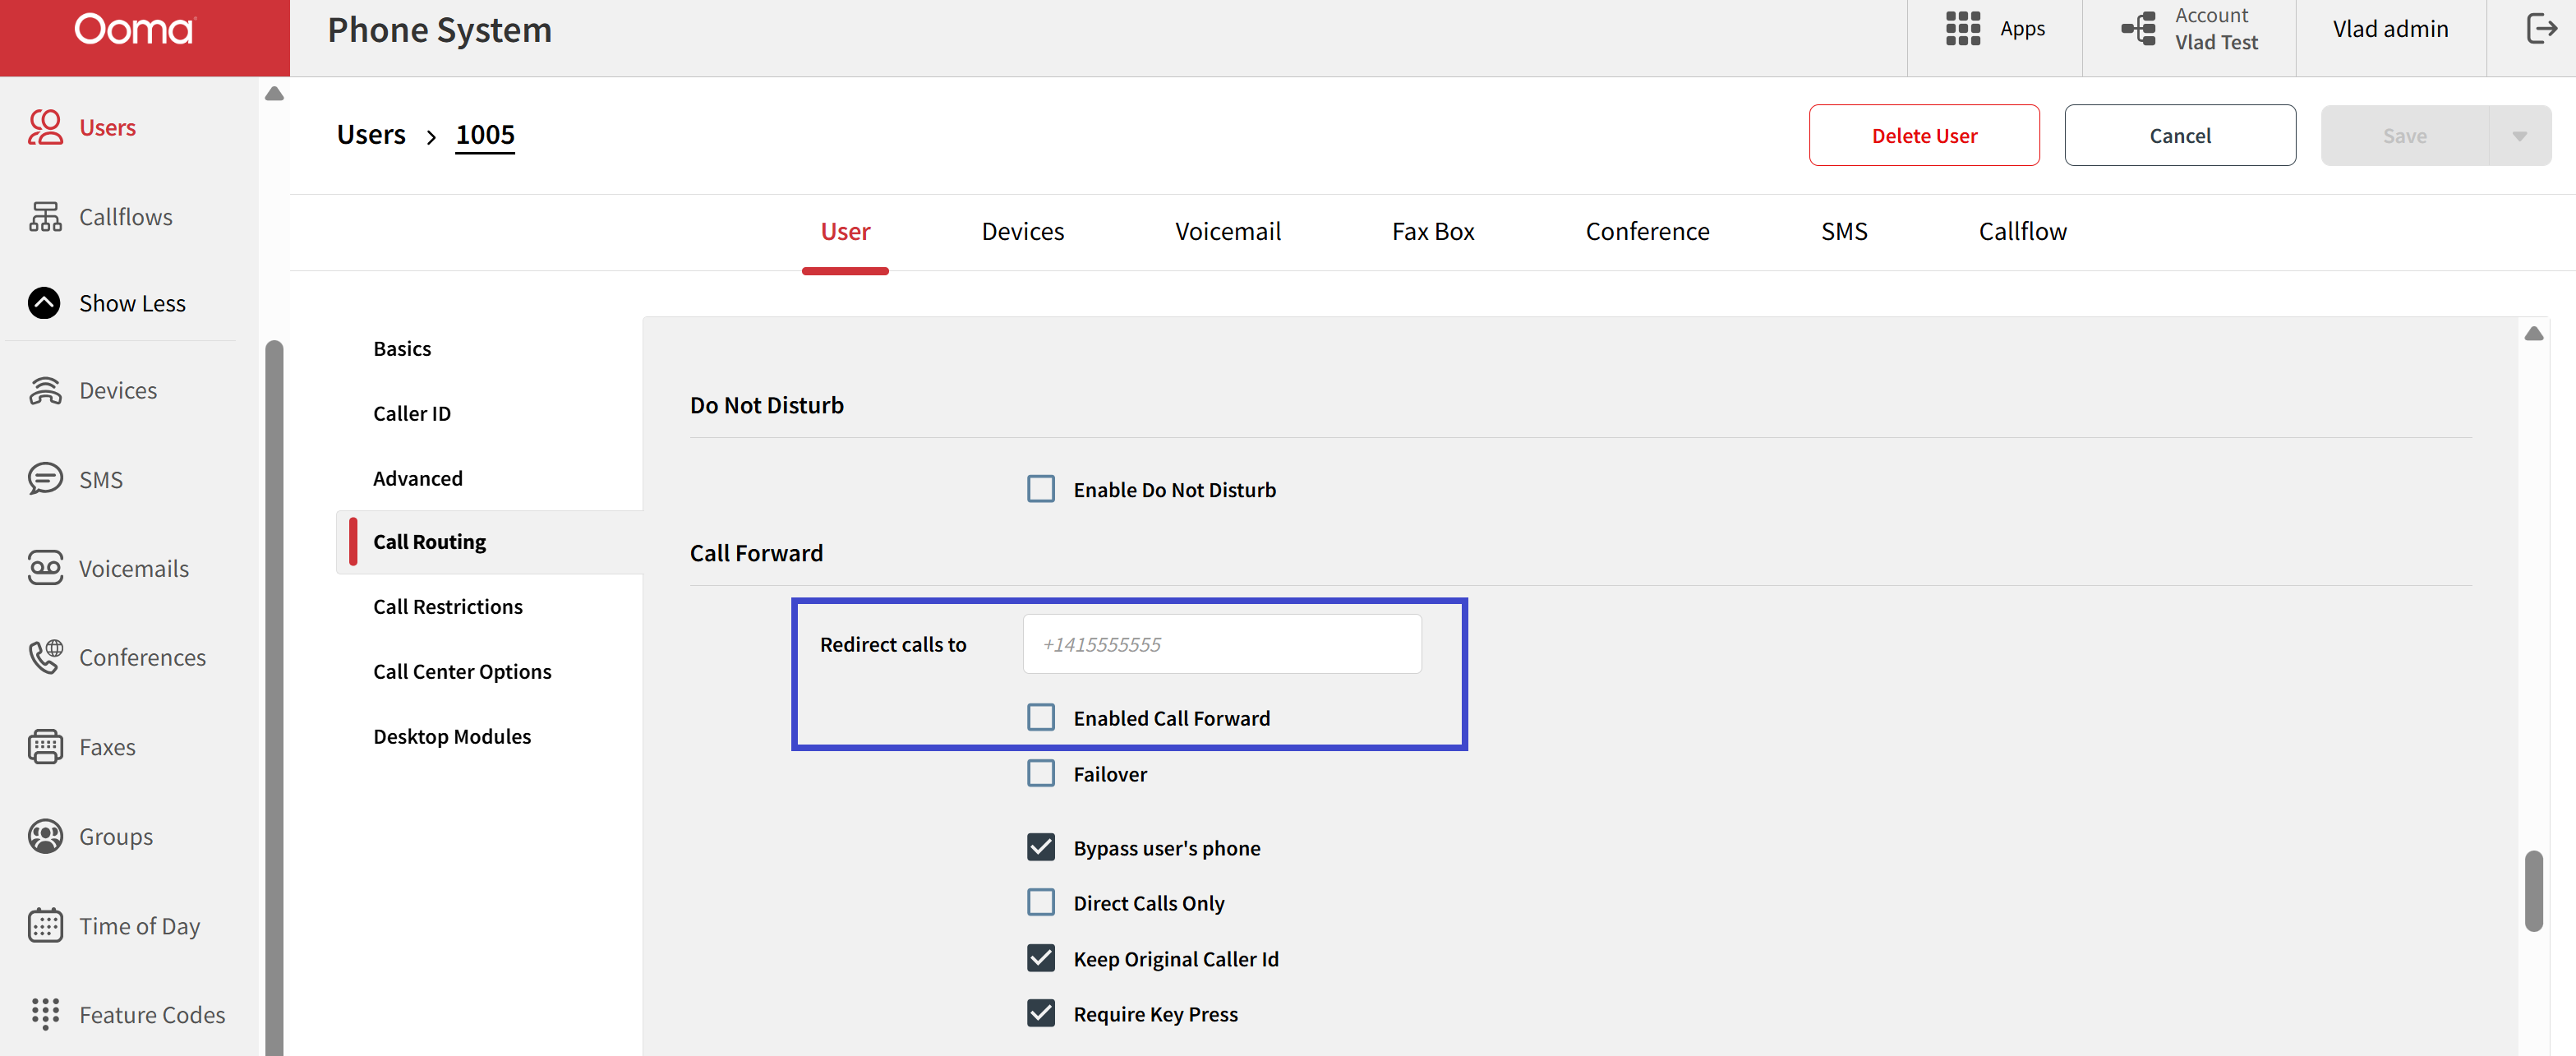
- Enable Call Forward: by selecting this checkbox, you can use the configured User and its associated phone number (purchased and/or assigned on the Basics section) in the call routing process.
- Redirect Calls To: the purpose of this field is to specify the auxiliary phone number to which incoming calls initially directed to the User's main number will be redirected.
Let’s examine all the Call Forwarding Actions and how to use them:
- The Enable Call Forwarding Action is employed to activate the Enable Call Forward parameter of the User. The Enable Call Forwarding Block is located within the Call Forwarding group of Actions in the Catalog of Actions on the Callflow Configurator's right-hand side.
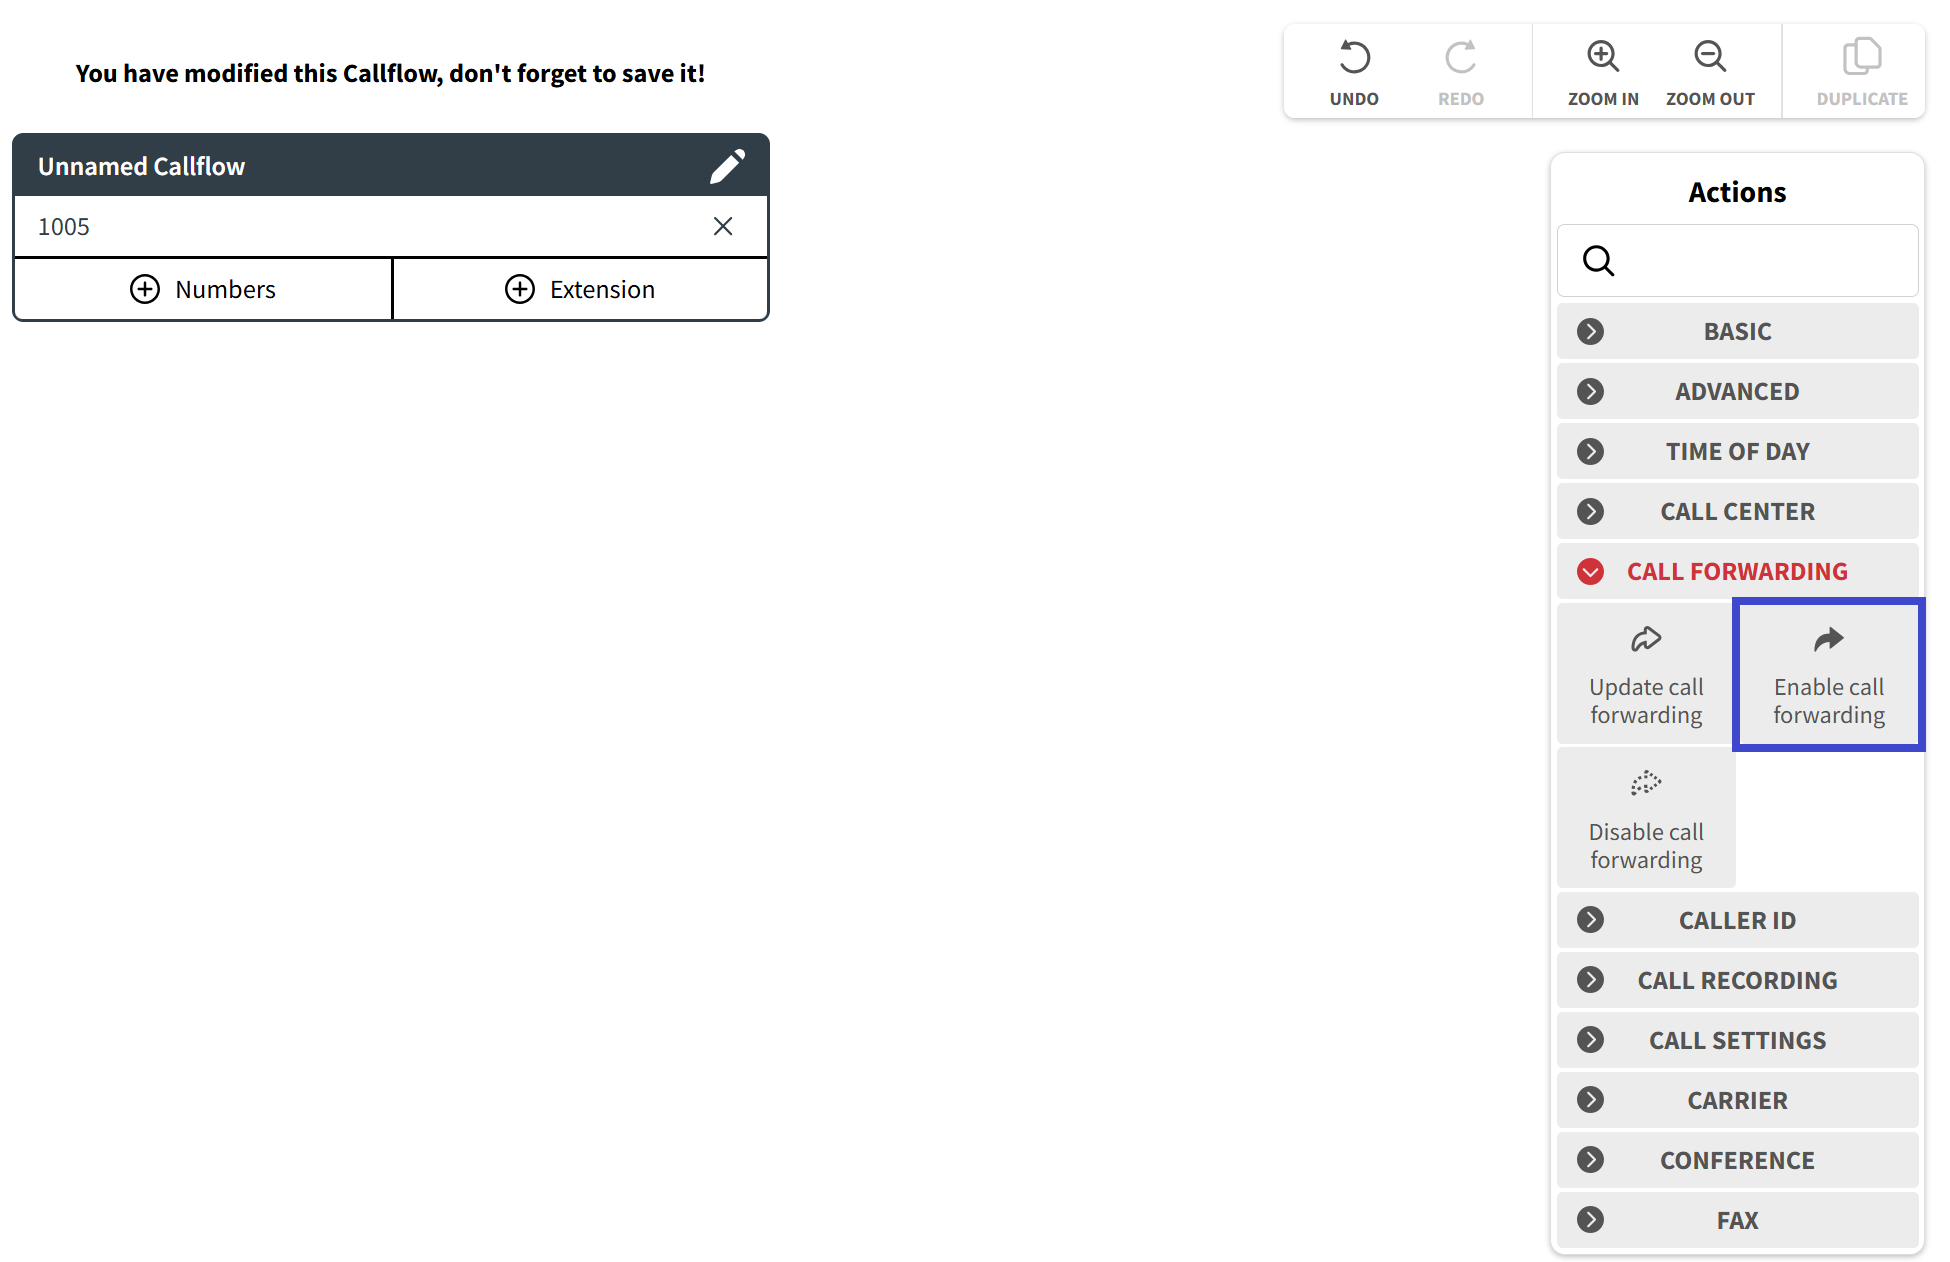
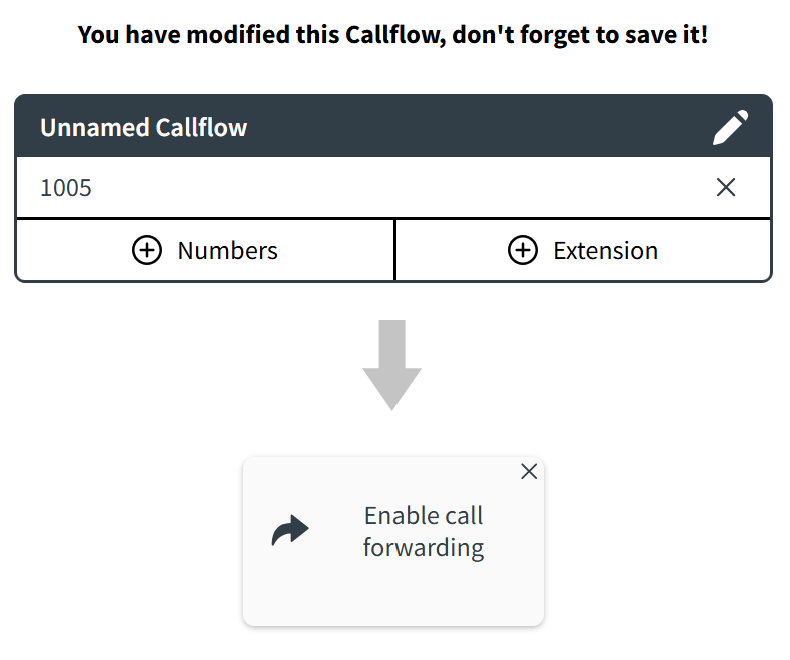
By using the drag-and-drop technique, you can transfer the Enable Call Forwarding Block from the Catalog and integrate it to the call flow. Please note, the Main Callflow Block should include the number leading with the designated User you wish to configure.
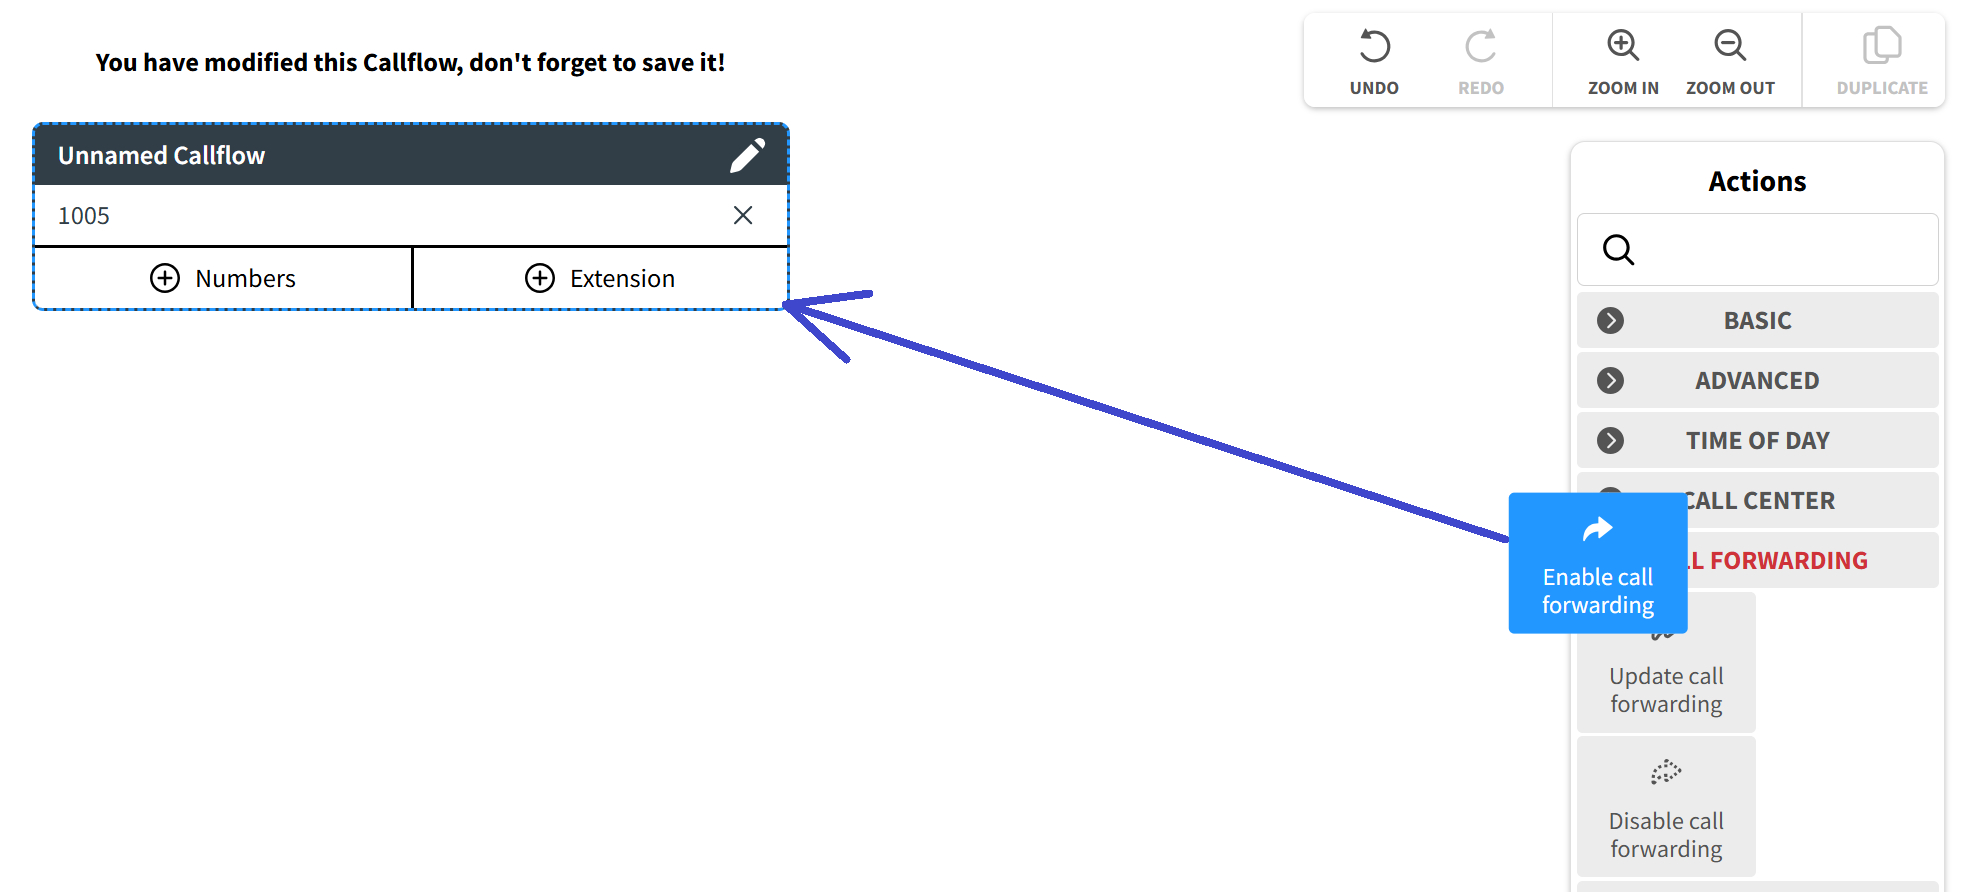
When you drop the Enable Call Forwarding Block onto the Callflow diagram, no pop-up window will appear for parameter settings. Upon receiving the call, this Block simply activates the Enable Call Forward checkbox of the User. A properly configured Enable Call Forwarding Block integrated into a call flow will be displayed as follows.
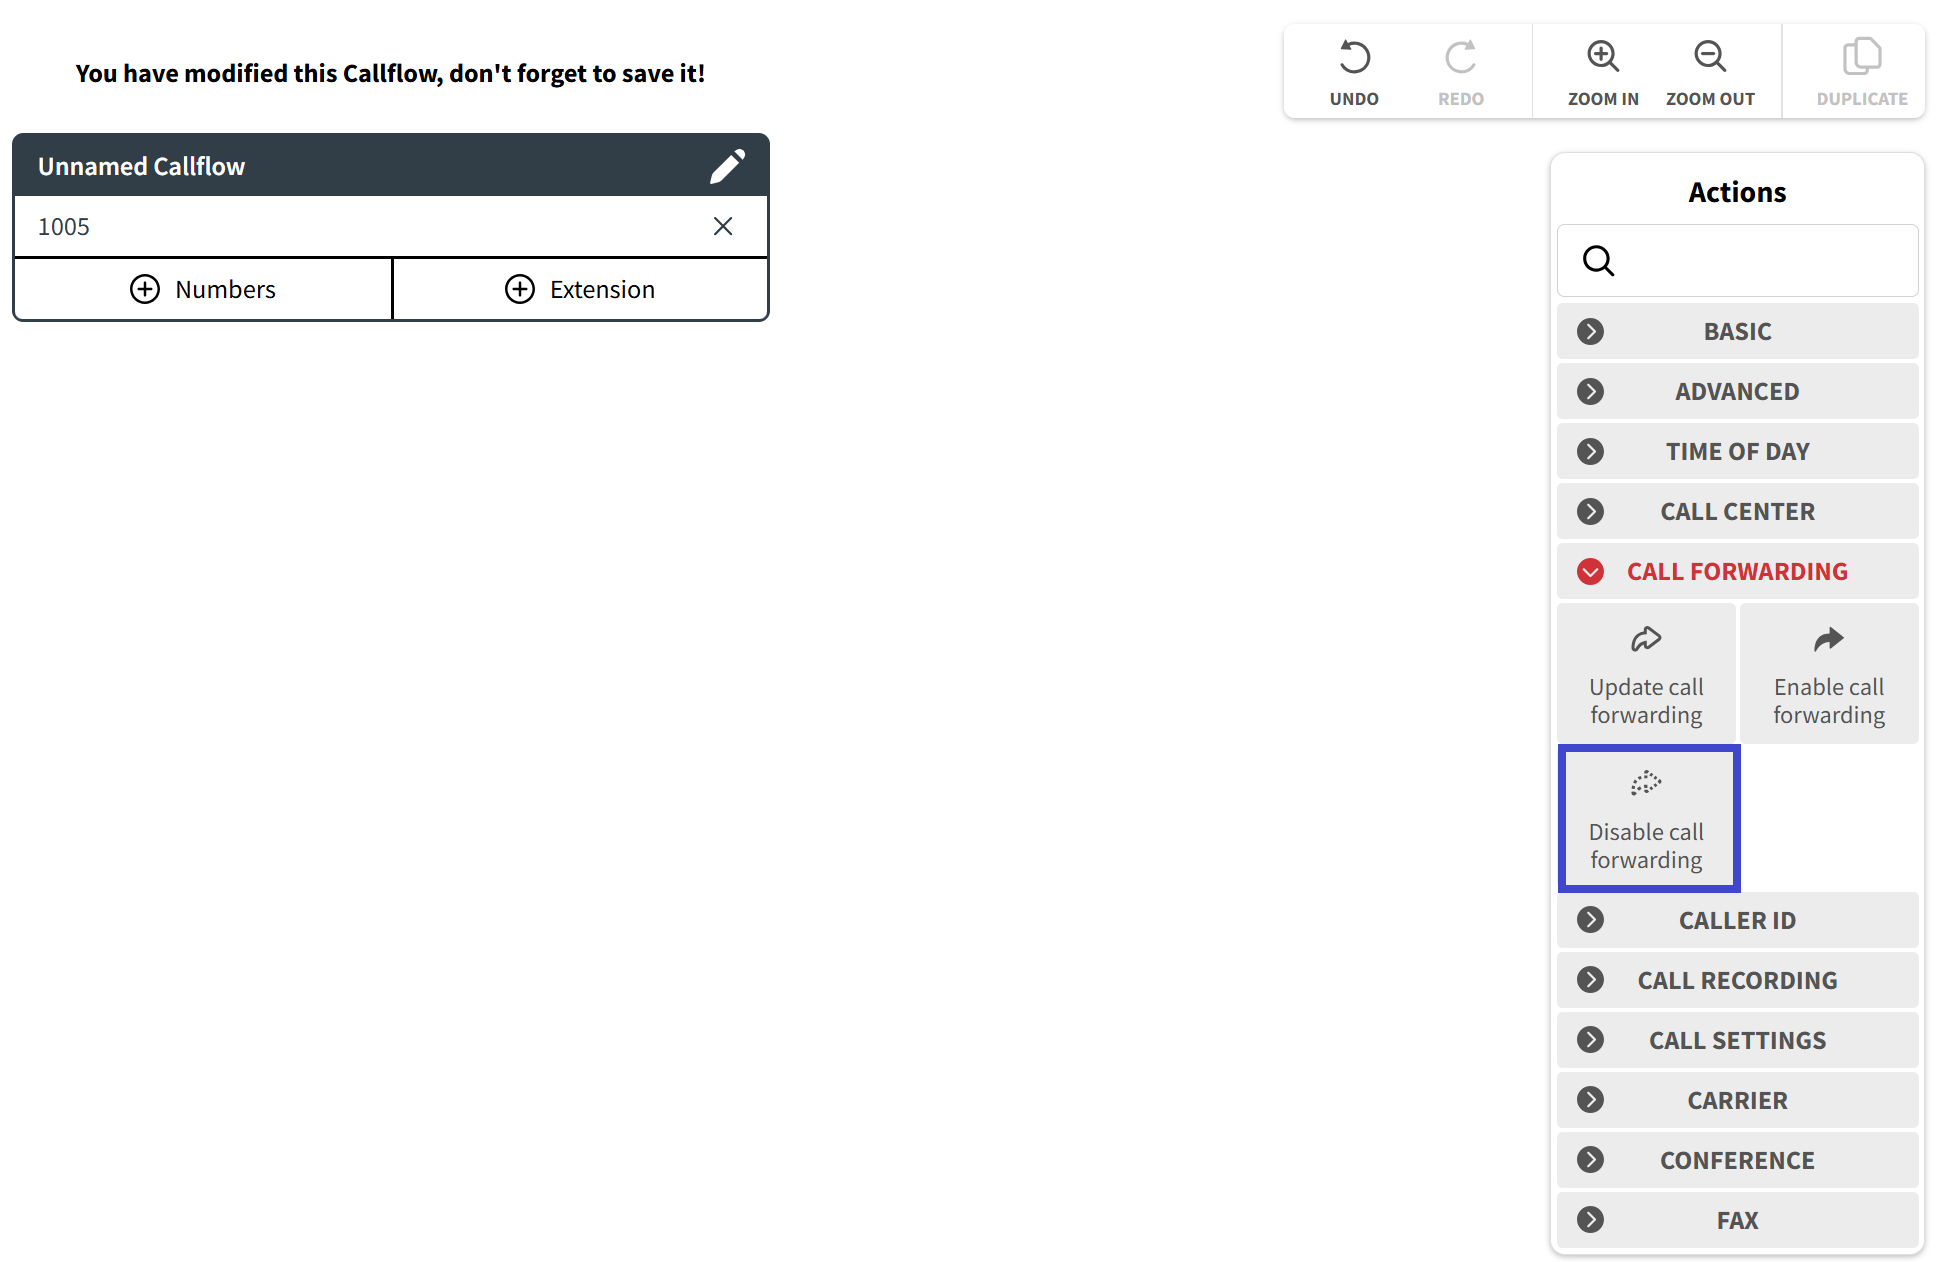
- The Disable Call Forwarding Action is employed to deactivate the Enable Call Forward parameter of the User if it was enabled. The Disable Call Forwarding Block is located within the Call Forwarding group of Actions in the Catalog of Actions on the Callflow Configurator's right-hand side.
By using the drag-and-drop technique, you can transfer the Disable Call Forwarding Block from the Catalog and integrate it to the call flow.
When you drop the Disable Call Forwarding Block onto the Callflow diagram, no pop-up window will appear for parameter settings. Upon receiving the call, this Block simply deactivates the Enable Call Forward checkbox of the User. A properly configured Disable Call Forwarding Block integrated into a call flow will be displayed as follows.

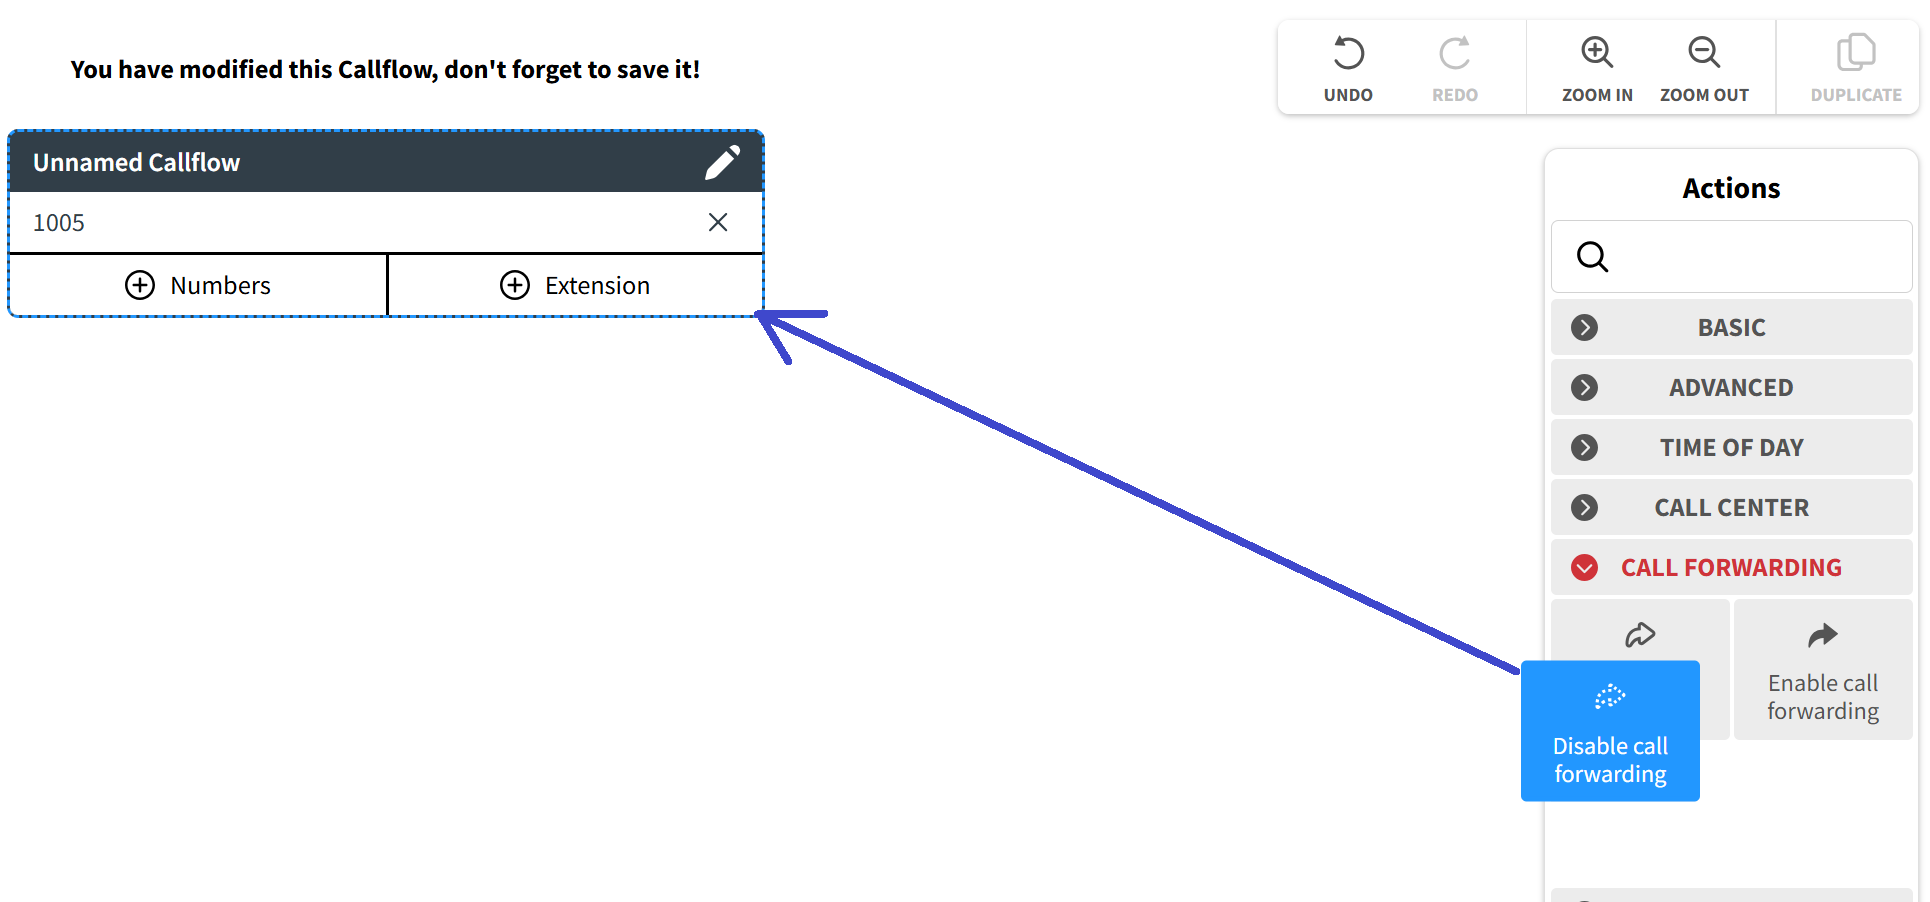
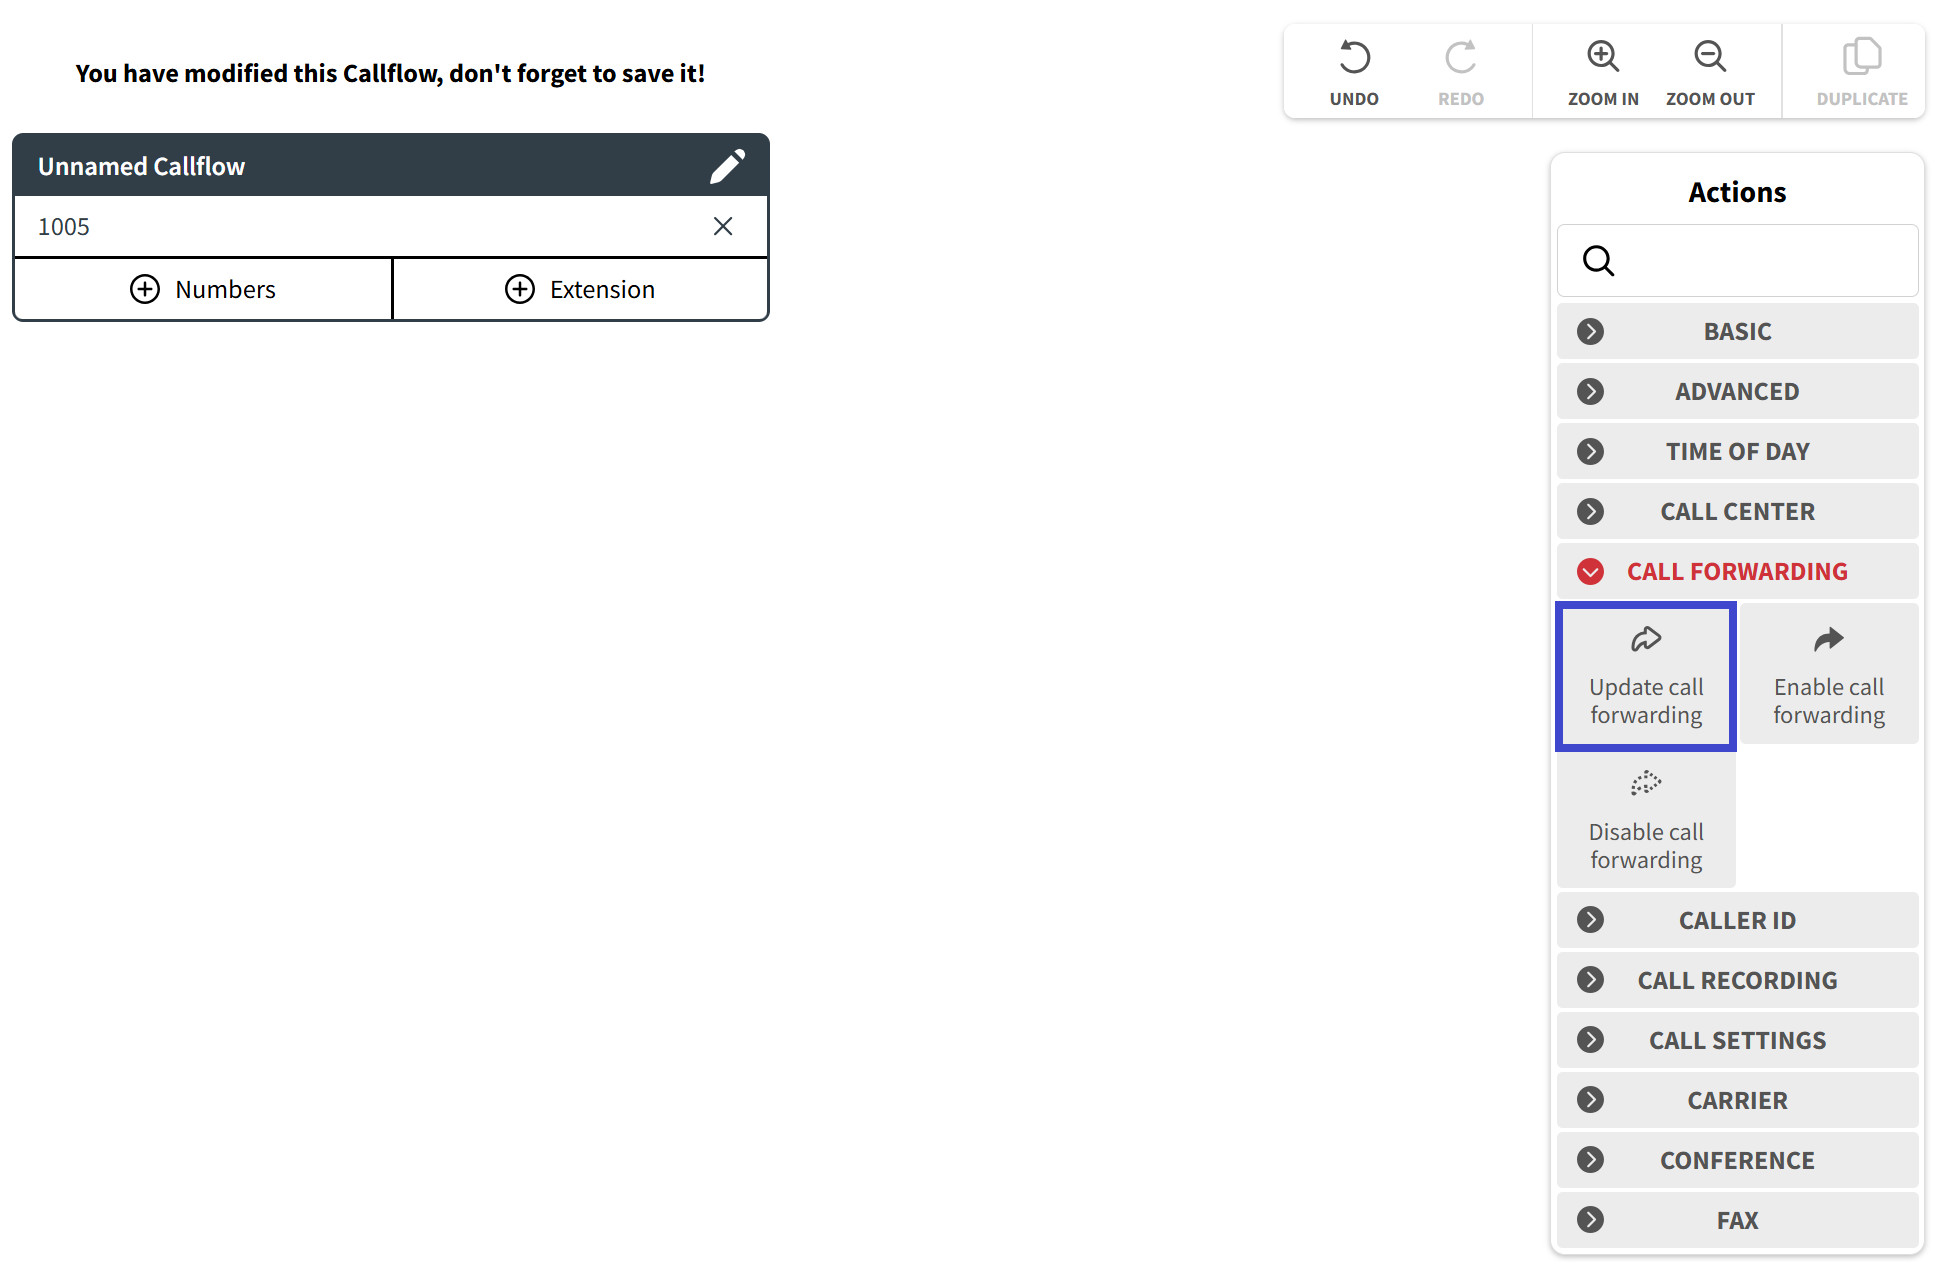
- The Update Call Forwarding Action is employed to activate the Enable Call Forward parameter of the User and manually input the number that will be stored in the Redirect Calls To field. The Update Call Forwarding Block is located within the Call Forwarding group of Actions in the Catalog of Actions on the Callflow Configurator's right-hand side.
By using the drag-and-drop technique, you can transfer the Update Call Forwarding Block from the Catalog and integrate it to the call flow.
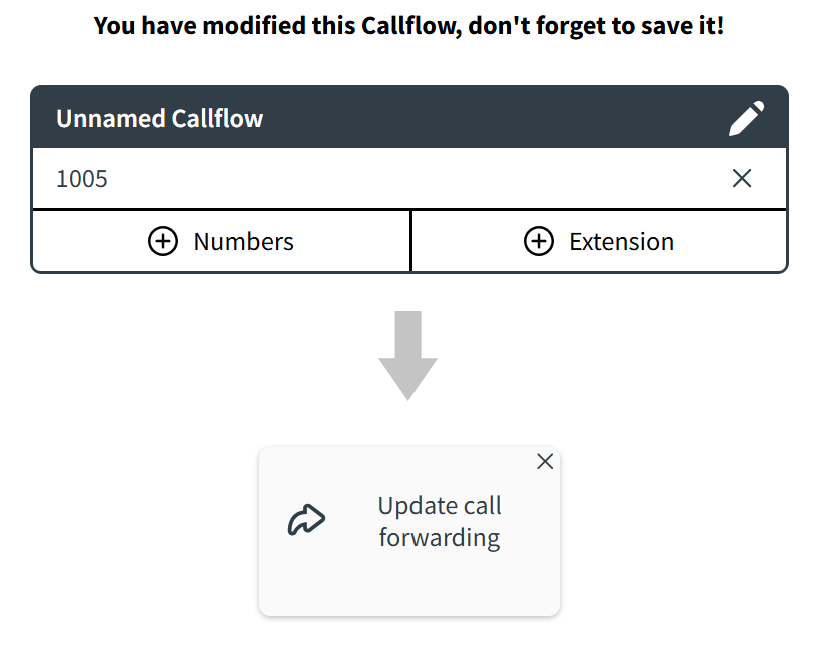
When you drop the Update Call Forwarding Block onto the Callflow diagram, no pop-up window will appear for parameter settings. Upon receiving the call, this Block activates the Enable Call Forward checkbox of the User and prompts the caller to enter a number, which the system will then place into the Redirect Calls To field. A properly configured Update Call Forwarding Block integrated into a call flow will be displayed as follows.
Once changes in the Callflow diagram have been made, the "Save" button will become active, and clicking on it will open a drop-down menu with three saving options.

- Save Changes: by clicking this button, you will easily save all of the changes you have made.
- Save and Duplicate: clicking on this button will save all modifications made to the current call flow and create a new call flow that duplicates the original. The name of the duplicated call flow will include the name of the original call flow, followed by the word "copy".
- Save and Create: clicking on this button will save all modifications made to the current call flow and create a new empty call flow. Cancel: clicking on this button will cancel any modifications made to the call flow. If changes have been made, the system will prompt you to confirm the cancellation of those changes.

Was this article helpful?
That’s Great!
Thank you for your feedback
Sorry! We couldn't be helpful
Thank you for your feedback
Feedback sent
We appreciate your effort and will try to fix the article